![]()

Greetings and salutations to one and all! I hope that everyone is enjoying summer and the great outdoors.
This will be another short article, I promise. But before I start, I want to pass along our condolences to
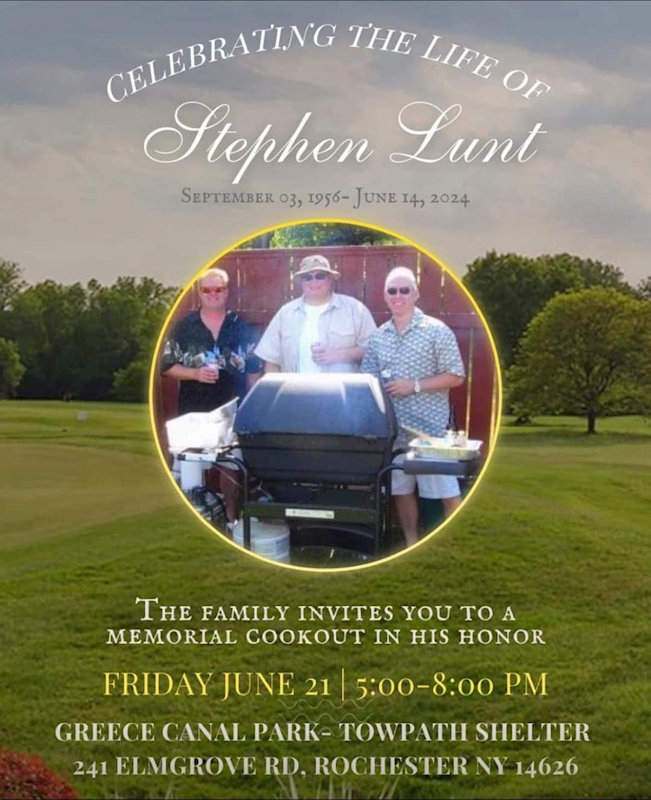
our sister club IPMS Rochester, as they not only lost a model builder but a great friend, Steve "Plane Steve"
Lunt, who passed away back on June 14th, 2024. Blue skies forever Steve!
Here we go: my family and I recently got back from our vacation, and this is the first time in years that
I did not take a kit to tinker with. So how many of you will bring a model along for the ride when going on
vacation, a weekend getaway or even for a business trip? This will interesting to hear.
How many of you were able to make it out to Section 8's first build night back on the 25th of June? How did you like it and did anyone take any photos? This is definitely a great opportunity to hang out with the fellow modelers and build. Heck, you may even learn a thing or two, regain that building mojo or even make your wallet lighter. The next build night at Section 8 will be the week after our general club meeting, July 23rd, 2024 from 6 to 8pm. Hope to see everyone there.
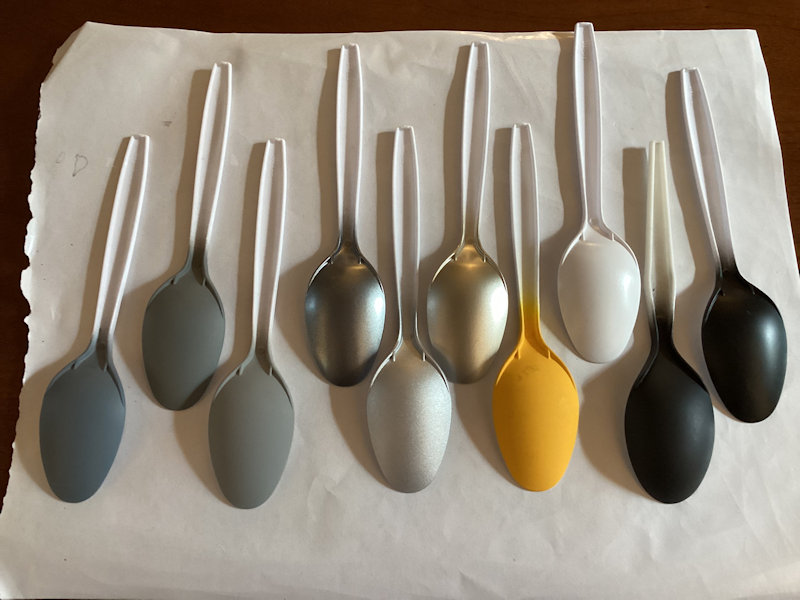
Thank you Steve Weller for stepping in for Al and doing a demo on researching/reference material for modeling subjects. For me, I am still the reference book (Squadron Signal) type of guy, but with modern technology aka the interweb, doing research and getting reference material has become easier and faster. For this month's demo, Al will be doing his "how to make a wall" using Styrofoam. I am really looking forward to this as I hope everyone else is too.
Just one more thing - recently, a new model shop opened in my parts (North Tonawanda) and it's called Madhouse Gaming and Hobby, located at 1089 Kinkead Ave., Suite 105, North Tonawanda, NY. They are geared towards Gundam and Sci Fi models. So, if you are ever in North Tonawanda, stop on by and say hi. Hours of operation are Mon-Fri, 2p-9pm and Sat 12-9pm and closed on Sundays.
As I mentioned last month, the summer meetings including this one will be build-n-bull sessions. Bring in something to work on, be it either for our club build or just a regular build, but bring in something to work on. It can be clean up of parts, subassemblies to assemble, BUT painting is not allowed unless it is to be brush painted (figures or detail painting).
That's all for now and I'll see you on Tuesday (7/16/2024) for the general meeting at 7pm at the Williamsville
Youth & Recreation center at 5005 Sheridan Drive, Williamsville, NY 14221. Parking and entry to the facility
will be in the back.
Happy modeling,
Michael Butry
President
IPMS Niagara Frontier
IPMS USA No. 52196

IPMS Niagara Frontier Meeting Agenda - July 16, 2024
NOTE: CANNOT ACCESS FACILITY BEFORE 6:50PM
7:00 PM to 7:10 PM - Place models on tables with description forms.
7:10 PM - Meeting called to order.
Old Business:
- None.
New Business:
- New model shop in town.
Questions from the floor.
Demo: Al Germann - Making walls using styrofoam.
Break: 5 minute stretch.
Table discussion: Members tell the club about the models they have on the tables.
- Members catch up on what's been going on since the last meeting.
Call for adjournment.

We would like to encourage all club members to join the national IPMS. Help support your hobby on a national level. IPMS provides the insurance that allows us to have our events, and membership includes a nice monthly magazine. The website can be found at: IPMS, and an application form can be found HERE.
The monthly general club meeting will be on Tuesday, July 16th at the Williamsville Youth & Recreation Center, 5005 Sheridan Drive, Williamsville, NY 14221, starting at the usual 7:00pm. Parking and entry to the building is in the back. There will also be a 50/50 raffle held at the meeting to help raise funds for the club. Directions:
Frank Blonski will be raffling off another one pound bag of premier coffee from New Day Coffee at the July meeting. This month's special flavor is called "Firecracker", chocolate with hints of spice. It's a very nice blend to keep you going for those late-night modeling projects. The raffle is $2.00 per chance, with all profits going back to the club.
We recently received some information regarding an upcoming model show. Here are the details:
IPMS Patriot Scale Modelers are pleased to announce Patcon 2024 scale model expo and contest. We're extremely excited to be holding this year's show on Sunday, September 15, at a new location: the hangar at the American Heritage Museum in Hudson/Stow, MA. In addition to the usual contest and vendor tables, there will be space for display-only models, a kids' Make-n-Take, new seminars, and hopefully several food trucks. In addition, anybody with admission to our show will receive a $2 discount for admission to the museum proper. We think this is going to be a great event and hope that many of you will be able to attend. The flyer has a list of categories on page 2 and admission fees and contest rules on page 3. More information is presently being added to our club web page: www.ipmspatriot.org.
To keep our club mailing list up-to-date, if you are a member of IPMS Niagara Frontier and have recently changed your email address or are not receiving the club newsletter and meeting emails, please contact our website coordinator, Larry Osolkowski, and pass along your email information. Thanks!
A link to the current Sprue and Glue News has been included in the Newsletter Blast emails provided by National IPMS. For those readers from other chapters, and anyone else who might be interested, our website has a Newsletter page with buttons to select any of our newsletters from the current year. There is also a button on that page to access the Archive page, which has links to all of the newsletters published since September 2007.
A NOTE TO NON-MEMBERS
IPMS Niagara Frontier is a group of people from the Western New York area who enjoy the hobby of scale model building. We have about 60 members with 30+ attending each monthly meeting. Our club meets at 7:00pm on the third Tuesday of every month at the Williamsville Youth & Recreation Center, 5005 Sheridan Drive, Williamsville, NY 14221.
A typical meeting starts with a short session related to club business. This is followed by "Show & Tell" - many members bring in their current work in progress to share experiences with other members. There is usually at least one model-related demonstration by a club member at each meeting. Meetings are free to the public. If you are in the Western New York area we would love to have you drop in to one of our meetings and say hello. We welcome modelers of all skill levels - from beginner to expert.
Our annual BuffCon event held each year in April continues to be one of the largest shows in this part of the country.
As a community-oriented club we also gather toys each Christmas for the "Toys-for-Tots" program and are proud of our support of this worthwhile program.
A brochure that describes the club and its activities can be found HERE.

Since our Secretary, Al Germann, was unable to attend the June meeting, there are no meeting minutes this month.

To promote greater transparency regarding the operation of the club and the EBoard, action items from the previous month's EBoard meeting will be published in the newsletter. These will not be detailed minutes of the meetings, but highlights that the general membership should be aware of.
There are no EBoard meetings held in June, July and August.

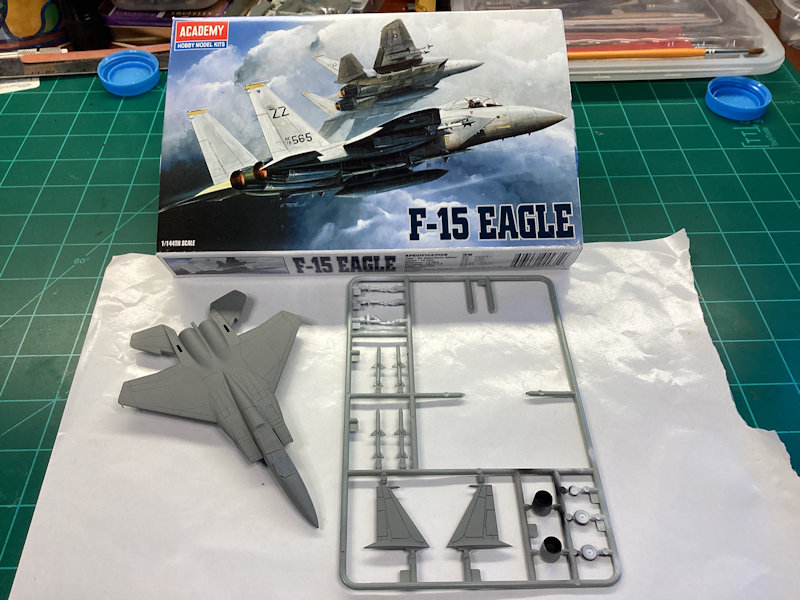
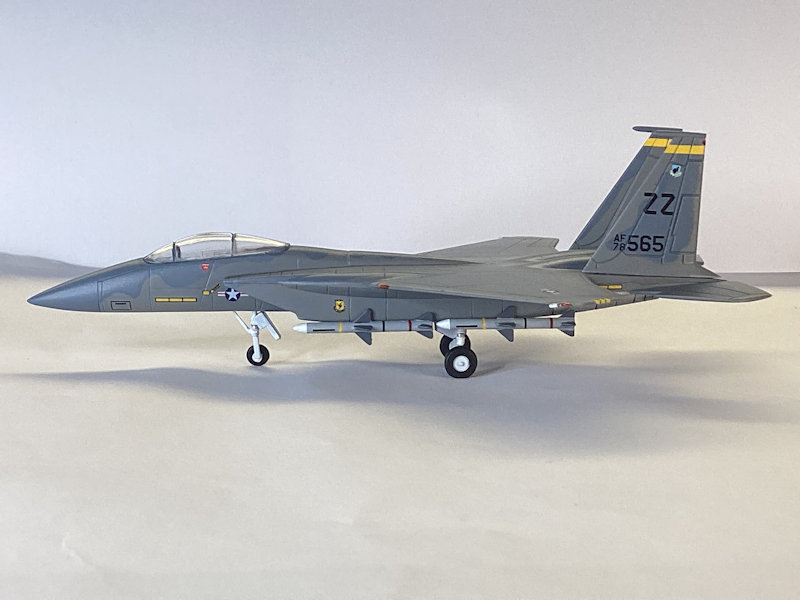
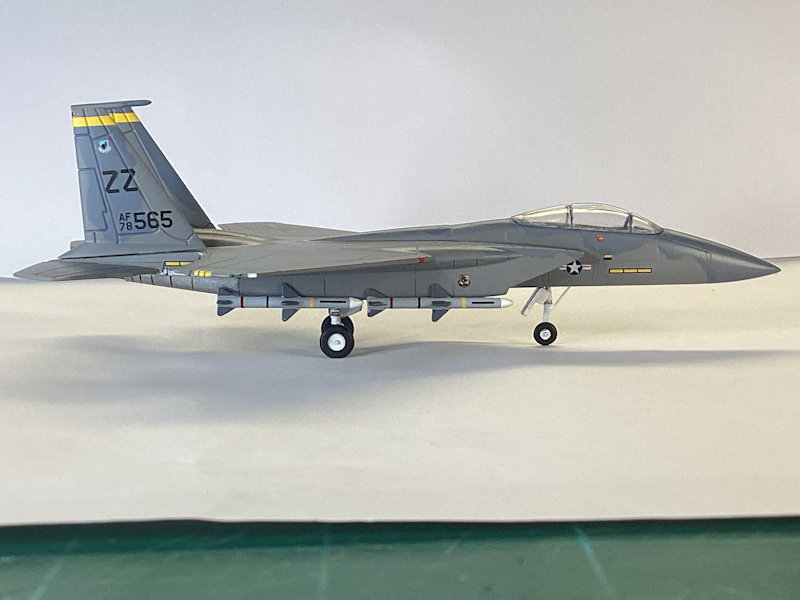
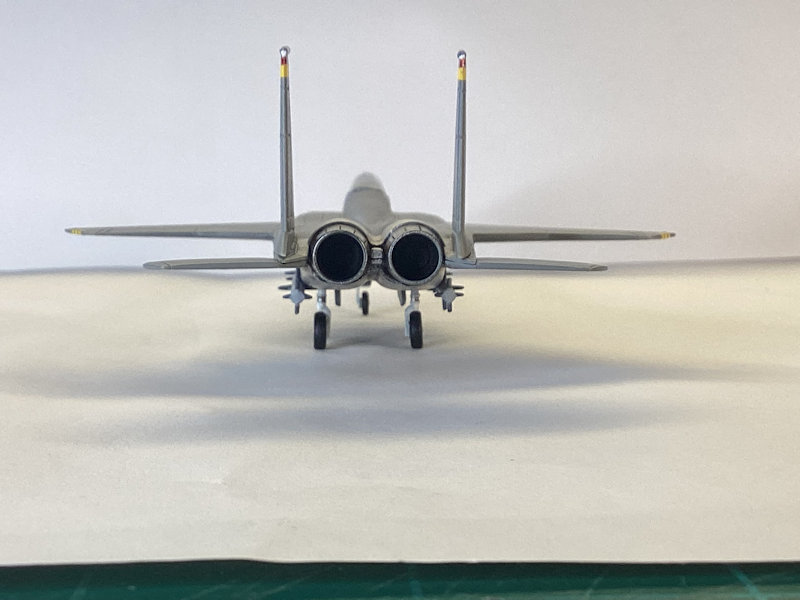
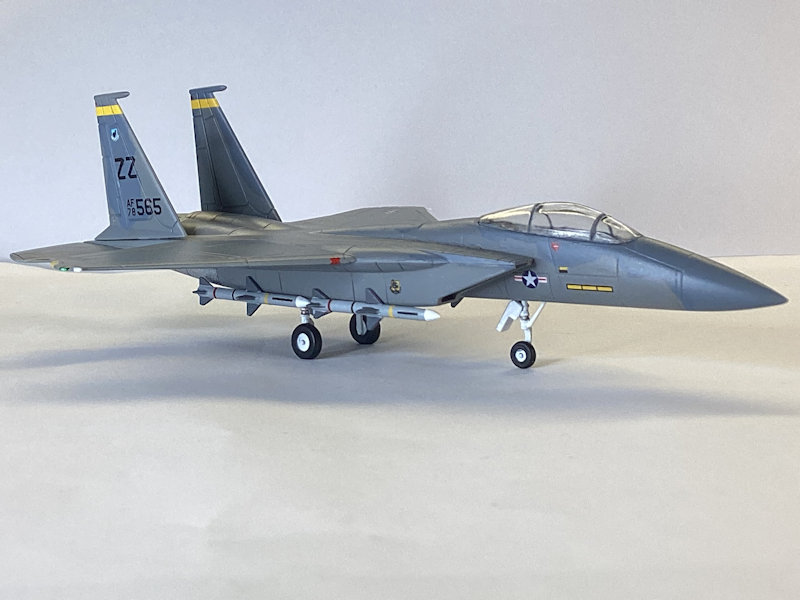
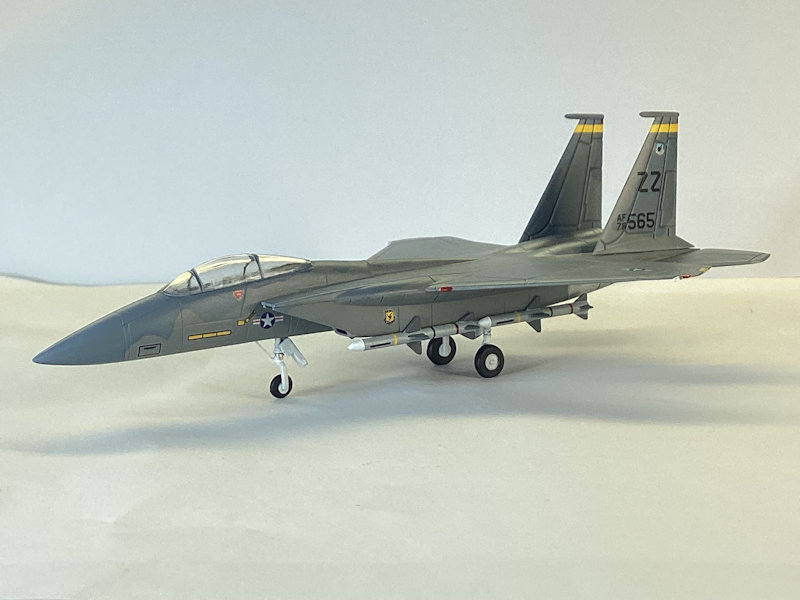
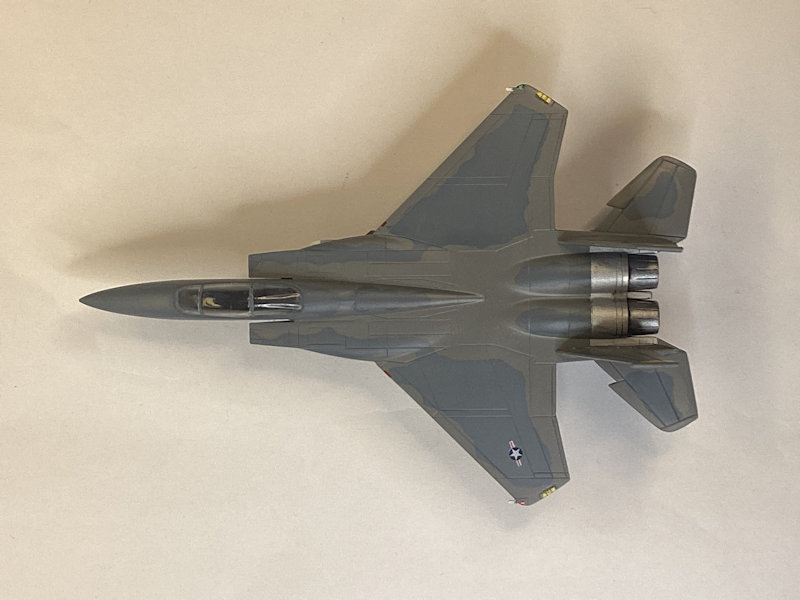
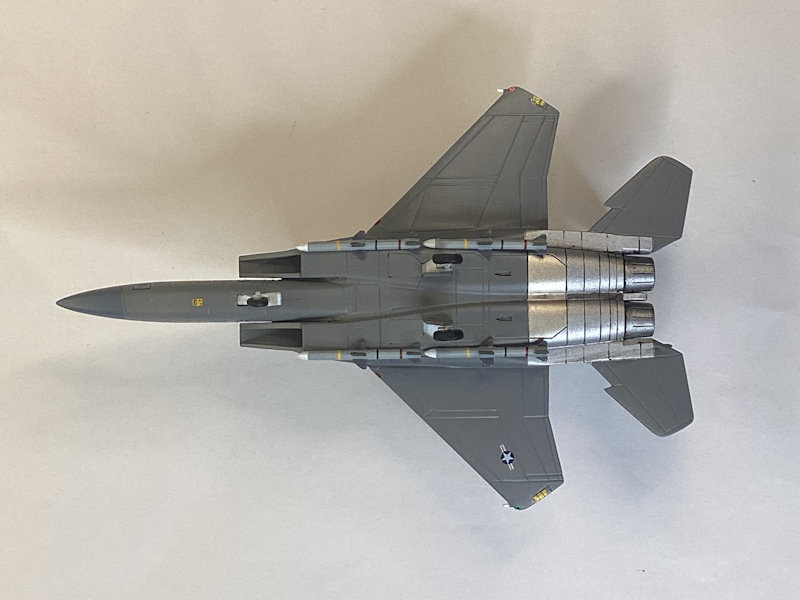
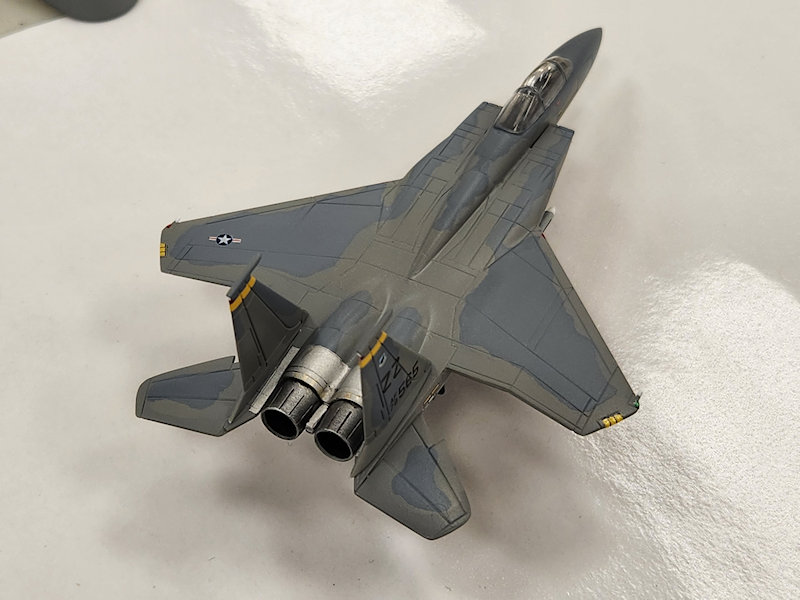
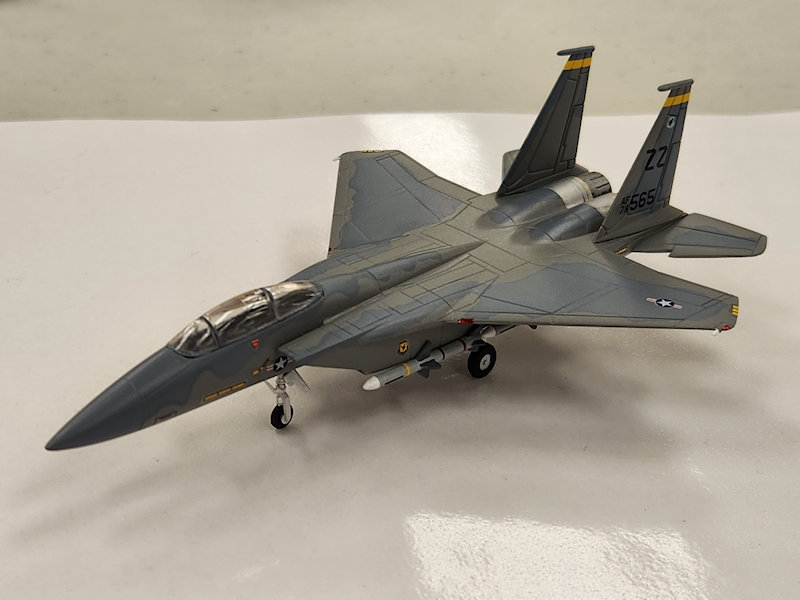
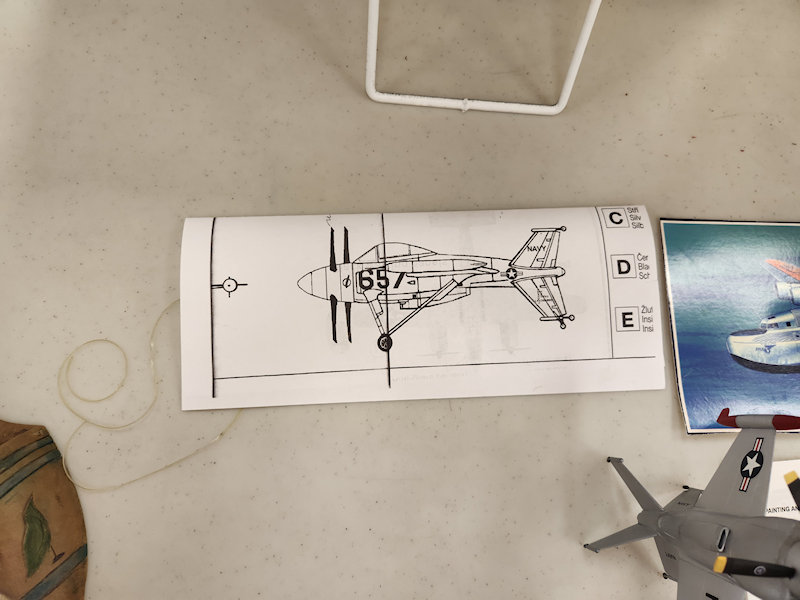
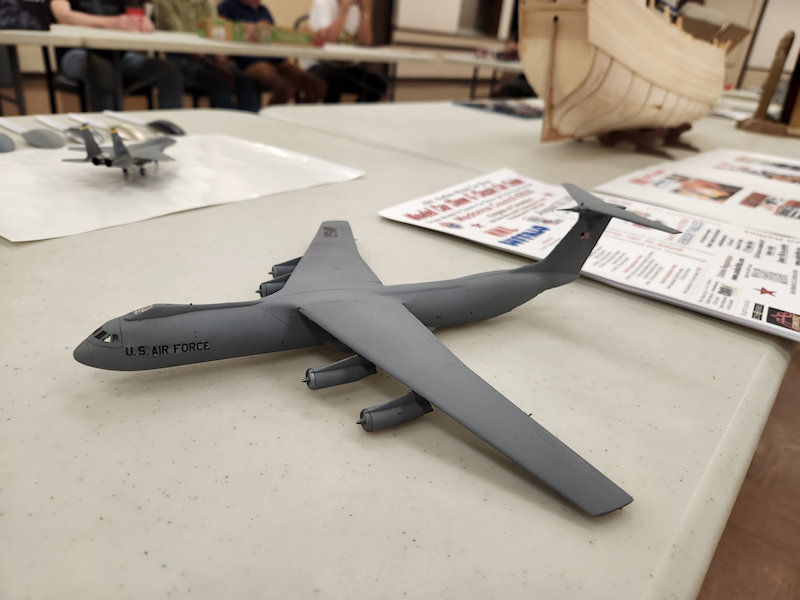
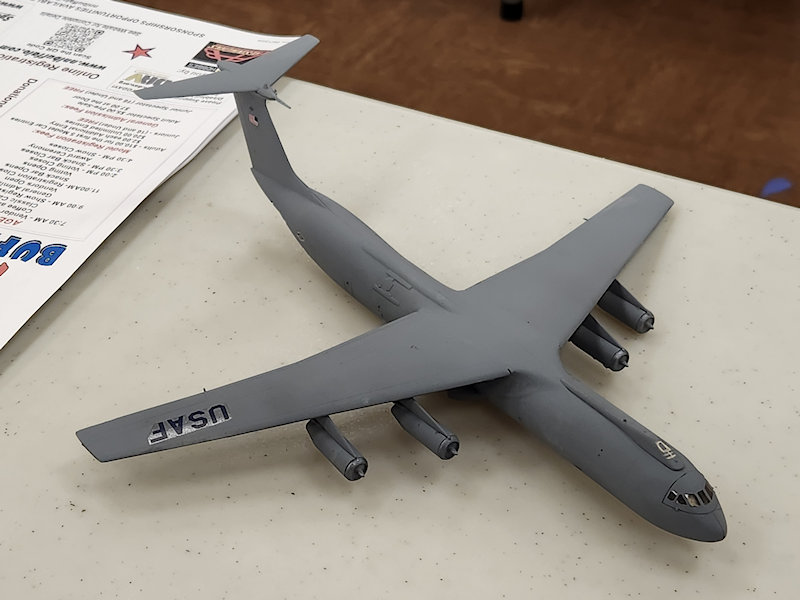
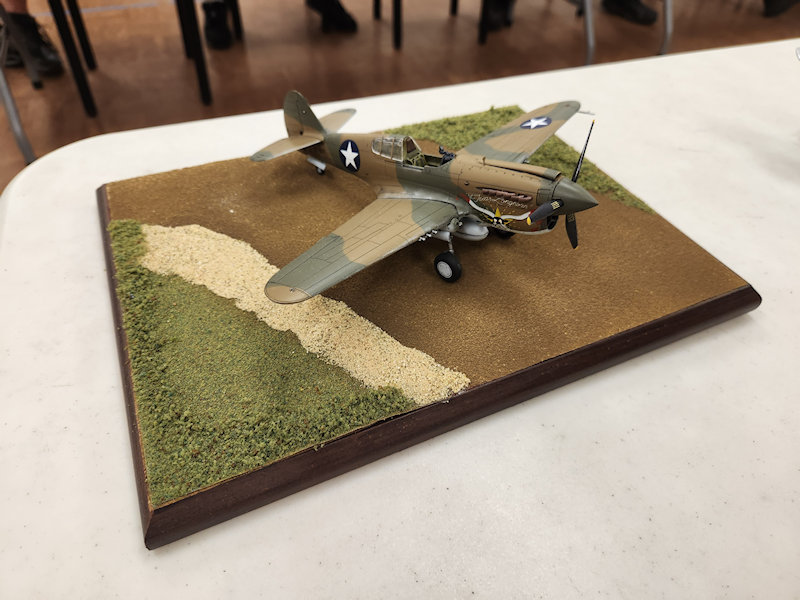
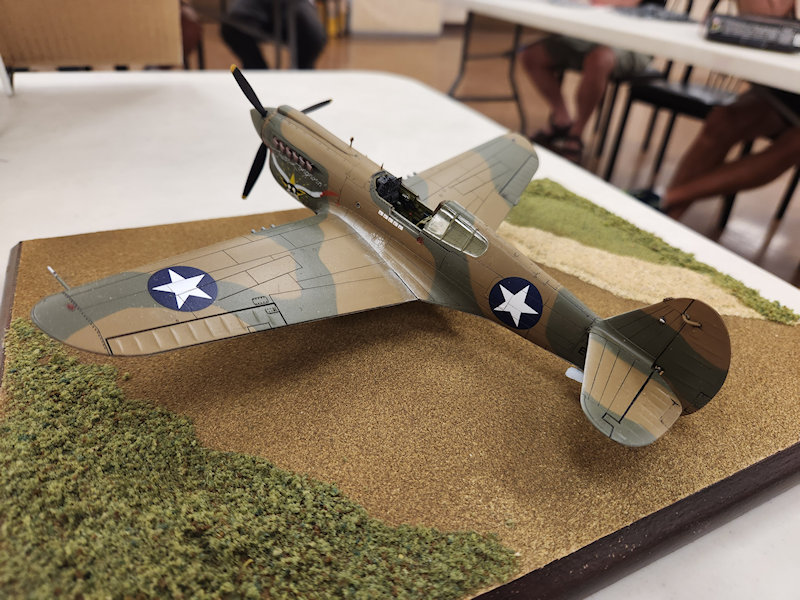
Academy 1/144 F-15 Eagle Build Review Kit 4435
by Bob Conshafter
Earlier this year, my friend Ed gave me this kit as he knew I built models. Ed retired from the USAF and spent most of his career as an eagle keeper. I don't usually build 1/144 but was already building a 1/72 scale Hasegawa F-15D for him with the serial number he used to work on at Kadena. I got bogged down in that build (more on that in another build review in the future) so I decided to at least get the smaller one done first. I'm building these models for a friend and it's kind of cool to do that as there's no intention of building for shows and you know that what you build has a little more meaning than just that sense of accomplishment.
The kit in question was first popped in the mid '80s by both Hobbycraft and Idea and box art depicts an F-15D two-seater, 78-0565, from the 18th Fighter Wing (ZZ tail code) based at Kadena, Okinawa, Japan with the typical Compass Ghost paint scheme in use in the '70-'80s. Like many F-15 kits, there's the legacy items like turkey feather exhausts and the old paint scheme/markings with the red, white and blue star and bar. The box art depicts a bird carrying a full sparrow and sidewinder missile load and a single 610 gallon drop tank on the centerline. Actually, what you get in the box is just the sparrows, no wing racks, sidewinders or drop tank. If you are a 1/144 scale afficionado there's a wide range of aftermarket items for this kit at scalemates.com. This site is awesome! It gives you the complete history of when a kit was produced in all its boxings and by who and often has the instructions available for download. Also, there's build reviews and photo galleries and links to books and reference materials and aftermarket products. I believe you can also manage your stash and see who's buying and selling what you might need.
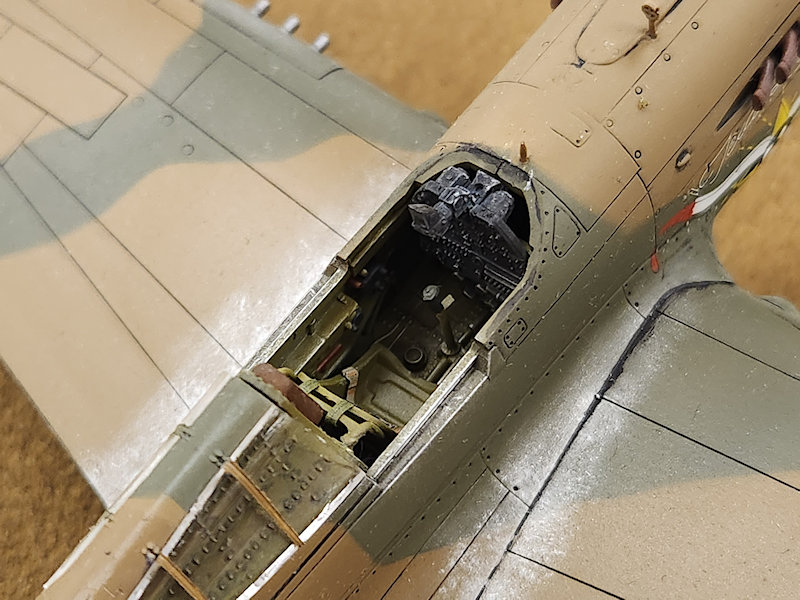
Instructions are straightforward with correct FS colors to use and call for 2g of weight in the nose. I used a fishing split shot weight. Earlier instructions from Hobbycraft have you using two "runners" which I think are pieces of sprue from the kit. There's the usual seam clean up and typical F-15 construction approach where you build the forward fuselage halves with vertical seams and join it to the wing/body which is a single horizontal seam. I noticed the wing body had a modest shift in the molding where on side was a little deeper than the other but this was resolved with a little scraping and truing. There's a noticeable seam/gap at the fuselage to wing join and I used Tamiya putty and Vallejo acrylic tube putty between the intakes and fuselage to fill that as the Vallejo putty comes with a fine point tip. There are a few concave and convex surfaces to clean up but nothing more than the usual modeling skills needed.
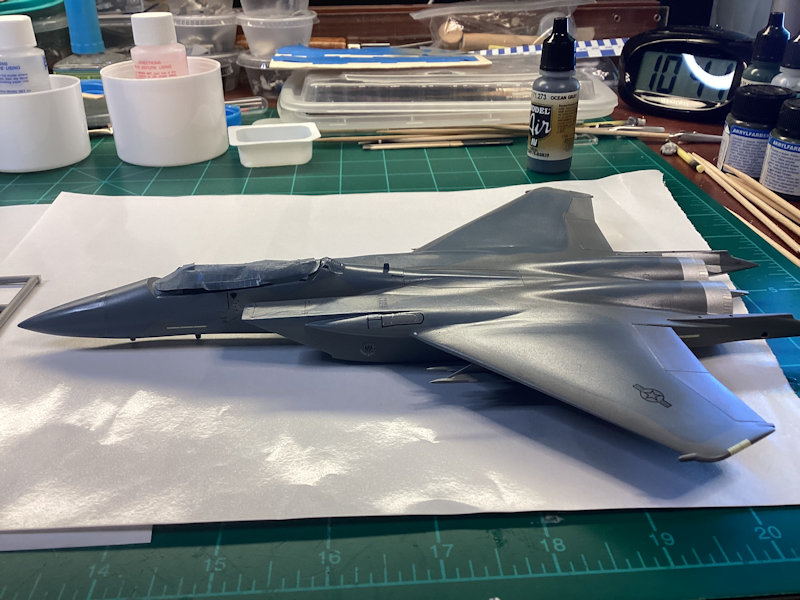
Everything from there including wheels, doors and missiles received an airbrush primer coat of Tamiya XF-19 Sky Grey. I like using the Tamiya paint for this as their paint has a good "bite" and you have less of a chance of having your paint job pulling up with any masking tape. I chose to deviate from the instructions and paint the bird in the later "Mod Eagle" paint scheme of FS36251 Aggressor Gray and FS36176 Ocean Gray using the Vallejo Air War USAF paint set 1559905 that I picked up at Hobby Lobby. These paints are airbrush ready. Mod Eagle is a decidedly dark paint scheme (more on that later). I started with the aggressor gray over everything and then used silly putty to mask off for ocean gray. For secondary masking that doesn't actually touch the model, I like to use blue household painter's tape. This keeps the cost down and I'll usually place the tape on my hands to reduce the tack to avoid surprises later. This worked out OK. I use Tamiya tape for all on-model masking. The long noodles of silly putty are made by rolling the putty out as opposed to pulling the material and it's important to keep your hands free of oils with a little IPA so it will stick to the model.
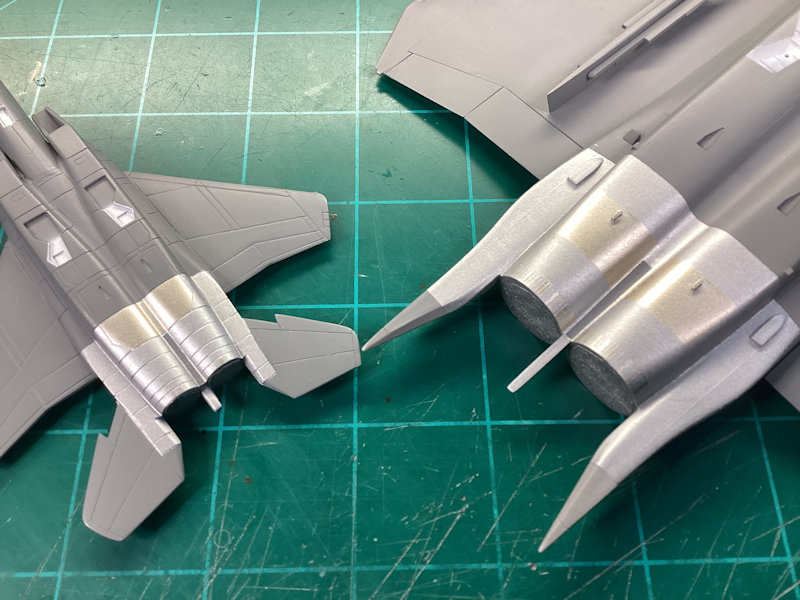
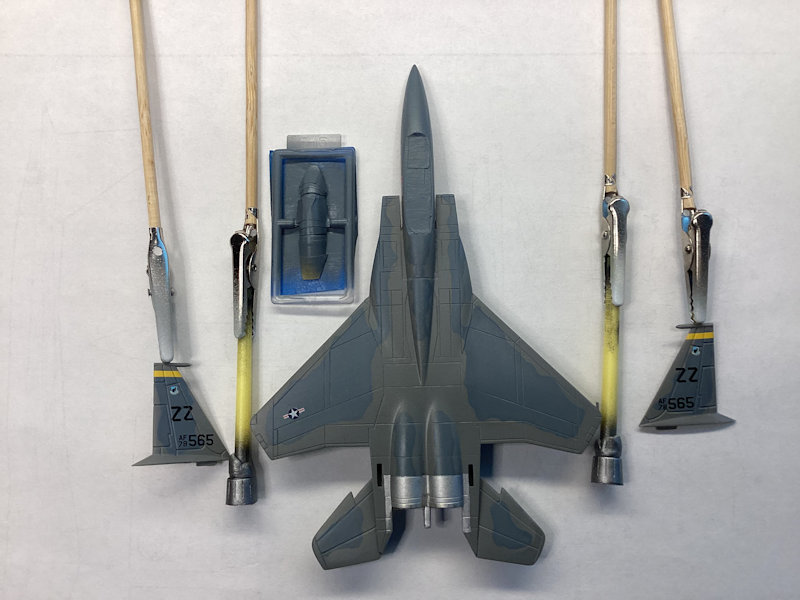
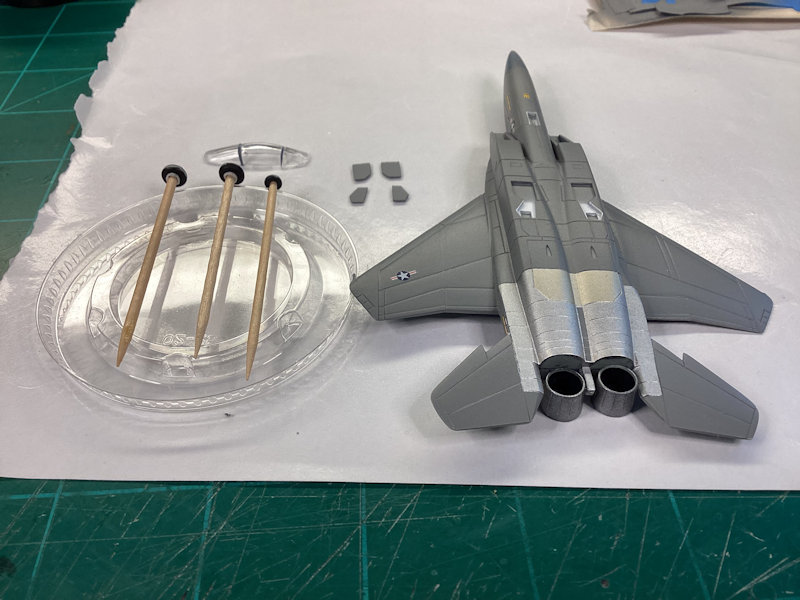
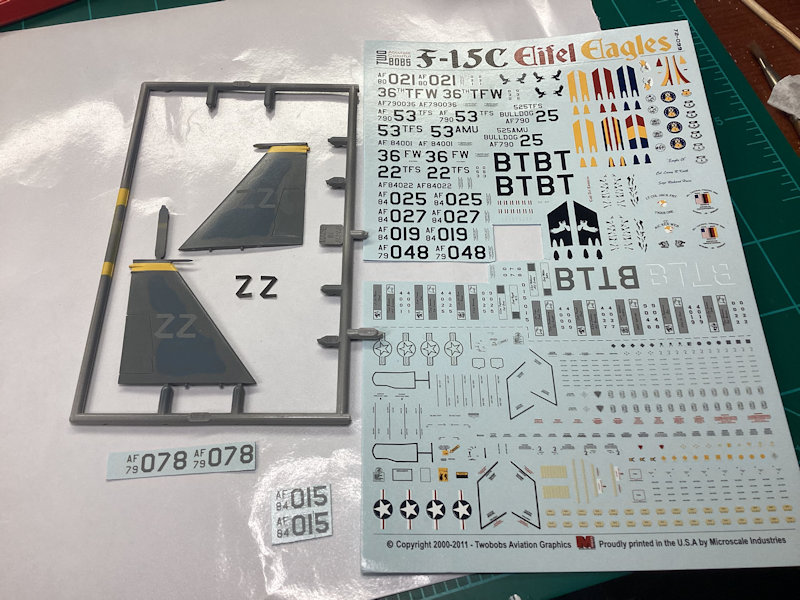
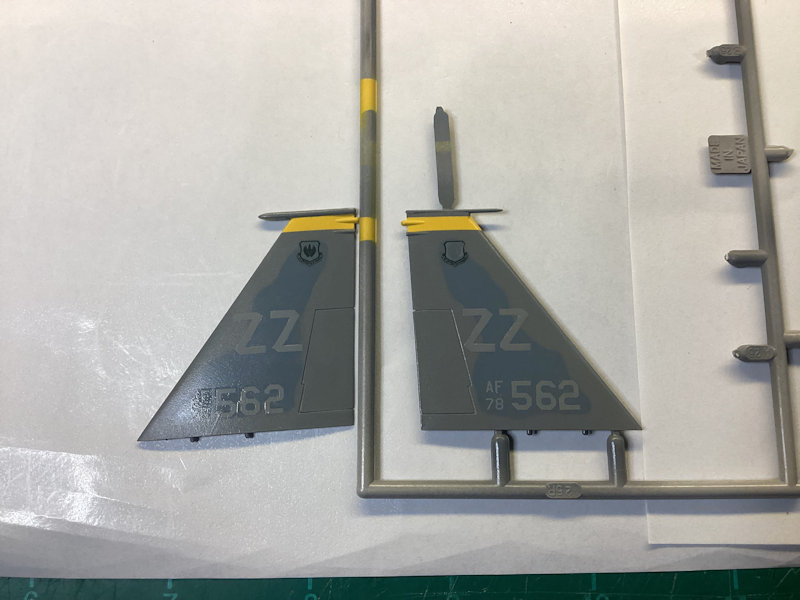
Next up, the bare metal engine area was first painted with Tamiya X-18 semi-gloss black followed by Tamiya XF-16 flat aluminum. I added a small panel area on the bottom for Tamiya X-31 titanium gold for some contrast. Basically, I tried to add a little interest and I departed from an "exact" approach for the hell of it. I painted the turkey feather exhaust cans Tamiya X-10 gun metal. If you want a nice titanium finish on the bare metal access areas on the bottom of the plane, X-10 gun metal gives a deep plated looking finish similar to what old in use titanium looks like. I plan on going that route in the future with my other larger scale F-15 builds. All basic painting of regular colors was done with a 50/50 mix of paint to alcohol thinner with an Iwata Neo airbrush at approximately 15psi. You can use water, too, and sometimes I'll use 70% IPA. Using more water helps to avoid paint build up on the needle tip from rapid drying. For the metallic colors, I used 70% thinner and 30% paint at 15psi and this gave a very metallic, plated luster and made clean-up easier. The vertical fin tips each received a flat yellow band of Tamiya XF-3 which represents the 12th fighter squadron within the 18th Fighter Wing. Then the model received a coat of Micro Scale clear gloss.
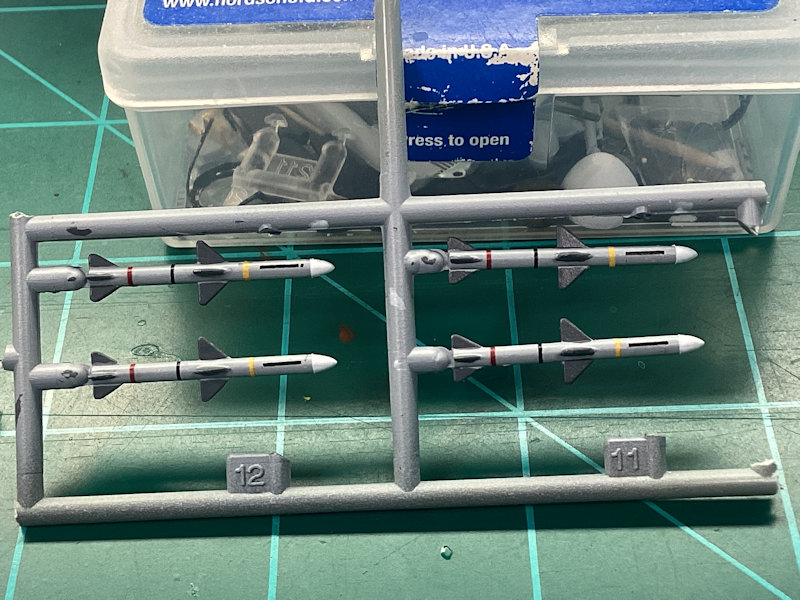
Missiles are actually painted FS36375 light ghost gray which comes as a polyurethane from the USAF paint set, no thinning needed. I left the missiles on the sprue to ease painting and decaling and this approach worked well. I used FS36118 gun ship gray for the missile fins as I didn't want them too shiny by using metallics, especially in that small scale. I used the yellow fin stripe decals for the live warhead bands as the verticals were going to be painted, not decaled. The black and red bands are from a set of colored stripe decals out of the decal box which is getting heavier and heavier. I used the red to simulate the red-brown live rocket motor in the back as it was dark enough to look the part.
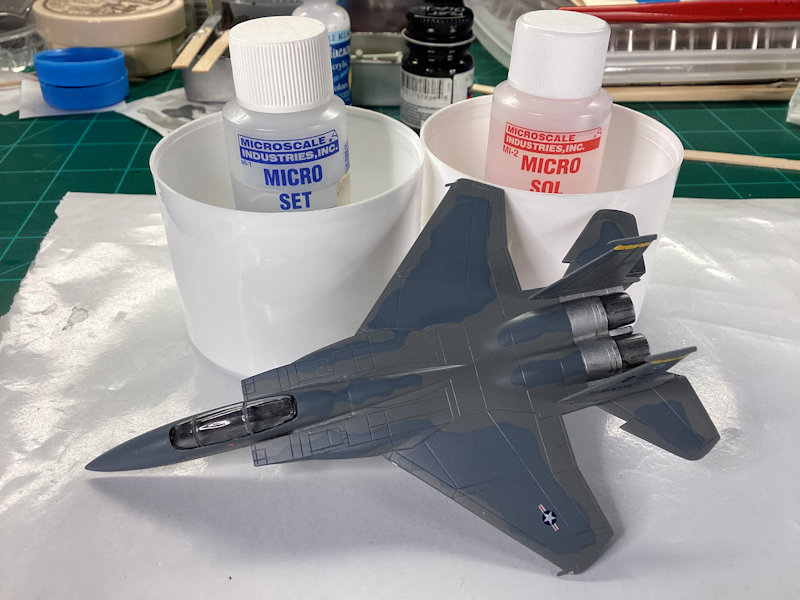
The gear was painted Tamiya flat white and Model Master acrylic flat black was used on the tires after they were mounted on toothpicks. The canopy was masked off and painted flat black followed by ocean gray at the same time the plane was done. I chose to leave the vertical fins on the sprue for paint and decals and that worked well. I'll talk about what I learned about the vertical fin decal placement in a bit. The kit decals worked quite well and went down with no silvering with Micro Scale Micro Set followed by Micro Sol if they were over the panel lines. This model has very deep recessed panel lines and I chose not to try to inlay any panel line color as this would look too chopped up on such a small model. I did go this route only on the bare engine access areas on the bottom of the plane and the exhaust cans using black tempera paint. Finally, a coat of Micro Scale clear flat sealed everything in. I used super glue medium to install the verticals, gear and the exhaust cans. I didn't try to putty in the verticals to the fuselage at it looked close enough. The cockpit area received flat black as it's a flat area and there is nothing there to look at. I mixed up some Testors canopy glue with the ocean gray and installed the canopy. This worked well as the fit isn't perfect but you can add some of the glue around the back and it came out fine.
Some Lessons Learned
The decal placement on the vertical fin: they chose the logical approach of making sure the ZZ and 565 were lined up parallel to other existing panel lines as well as the horizontal rudder panel lines. This would be fine on any other model. However, the rear top engine deck of this F-15 model has the engines sweeping upward and the mount area for the verticals sweeping downward to the back. When I mounted the verticals, the ZZ and 565 number were slightly angled upwards toward the front of the plane. It was too late to adjust the decals as the flat coat was on. At this point, the landing gear wasn't installed yet. I decided to reduce the upward sweep problem by sanding down the thick nose landing gear mount pad that attaches in the well. This gave the bird a slight nose down look and, for the most part, corrected the decal angle problem on the tail. We'll just say that the nose strut needs some servicing. There has to be an F-15 somewhere that needs its nose strut serviced! Just make sure you tape or glue in place the verticals while decaling with the plane flat on the table for reference and you'll be all set.
The overall dark finish: I chose the Mod Eagle scheme which is a darker scheme and I used the Vallejo model air paints without consideration for "scale effect". It's entirely possible that these paint colors may be on the money for a full scale bird. In the future, I would spend a little more time asking myself if it simply looked the part. Given the small scale, it looks pretty dark. If I were to do it again, I would use Tamiya XF-19 sky grey for the 36251 aggressor gray and use the Vallejo ocean gray as is. This would make for a lighter appearance and give good camo color contrast and address the scale effect issue. If there's one thing that's helpful to learn in modeling it's to go more for how it looks over how it really is in real life as we can't duplicate real life anyway!
Verdict: overall, I'm happy with the model and it makes for a quick build if you're willing to set aside that constant need to improve things in the name of accuracy. The vertical tail tips both appear to have the Magnavox radar warning receiver pods and only one is actually used on the left fin. I chose not to mess. It would be nice if Academy would provide an alternative more recent paint/decal scheme but overall, the little F-15 looks the part. If you happen to have some 1/144 modern USAF star and bar markings and small numbers in your decal stash then you're all set. Ed seems happy with it and he's getting a little display case to put it in. Now, back to the 72nd scale F-15D two-seater!


A Different Experience
by Dick Schulenberg
I recently had the opportunity to see our hobby from a different perspective than my usual obsessive efforts.
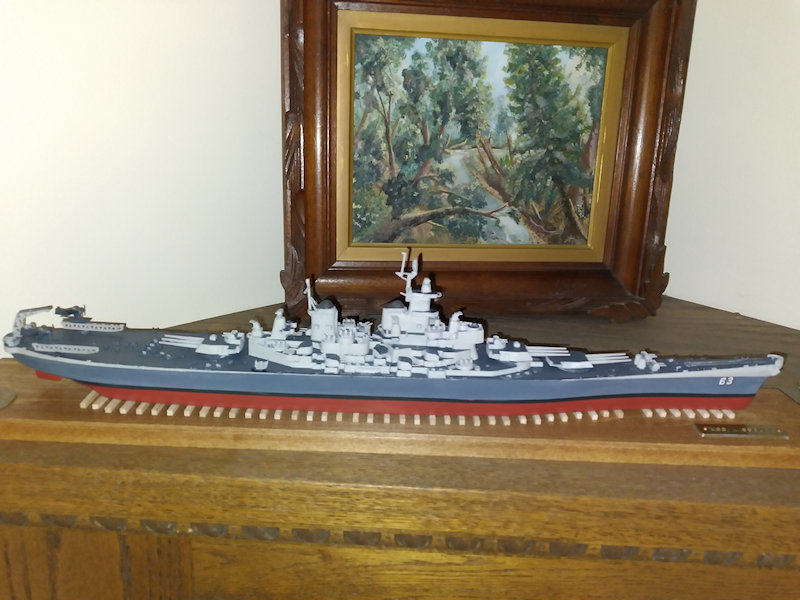
Mike Butry got a call from Aaron Damiano, a non-member who had a model he wanted built for his grandmother as a remembrance of her husband, a WWII Navy veteran. The model was the Revell USS Missouri. Mike asked me who I thought might be interested in the project and I gave him a couple of names. After thinking about it for an hour, I decided that it was something I wanted to do and asked Mike to connect me up. He did, and the kit was in my hands.
Revell has had a couple of different Missouri kits in their catalog over the years, starting with a 1/535 box scale virtual toy that has been reissued many times since 1953, and also issuing a very nice WWII 1/350 kit in the mid '80s and again in 2002, as updated for the Gulf War I believe. The kit I was given was a 1985 reissue of the 1953 kit marketed to commemorate the 40th anniversary of the signing of the Japanese surrender documents ending WWII. The instructions were similar to the originals but with the addition of a nice summary of the surrender ceremony and Missouri's part in getting there. It also included a plastic medallion with a potted history of the event.
Aaron's wife had picked up the kit at a garage sale, knowing that his grandfather was aboard Missouri for the last part of the war and was present for the signing ceremony. This made the specific kit she found particularly appropriate.
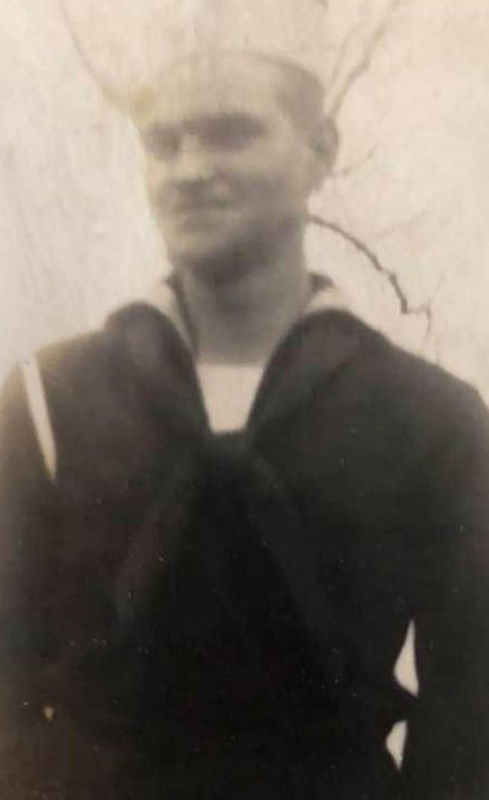
Like many of the young men at the time, Aaron's grandfather, William (Bill) Leitz, volunteered for the US Navy following the attack on Pearl Harbor. He served aboard Missouri from 1944 to 1946, rising to Seaman 2nd Class, 2nd Division, Gunnery Department.
The kit box art was really good and inspiring, but the model itself put me off when I first opened the box. 1953 all over again. The Revell Missouri is considered the father of all other plastic ships. It's been in production almost continually since then. The number sold was astronomical, because it was something new as a model and it had great play value. The hull height was truncated and flat bottomed which made the upperworks look more formidable and the flat bottom meant you could push it around on the rug and rotate the main turrets to fend off the enemy. All that detracted from the scale viewpoint, but, boy, what a toy.
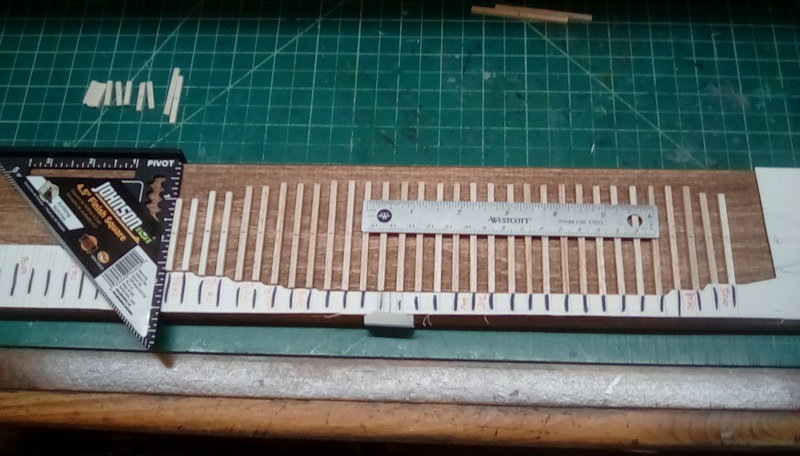
I made up some of the subassemblies and temporarily assembled the model to help develop a plan for painting the cast-in-place details. I also decided to trash the girder type stands and mount the model on cribbing to camouflage the flat bottom look a bit. Surprisingly, there was very little flash and most everything fit reasonably. I did add some tabs under the deck to push out some minor warps in the hull to deck fitup but that's the only addition I made to the kit.
I painted it in the 5N/Deck Blue/5H Blue/Gray Measure 22 scheme she carried at the surrender ceremony. Painting the different colors on the cast in details wasn't a lot of fun and it certainly isnt perfect, particularly at horizontal and vertical intersections. Once it was all together and matt coated, it looks reasonable at three feet away. All the turrets are glued solidly in place and the limited rigging shown on the instructions was omitted to avoid dusting catastrophes. The large holes in the deck for rigging were ignored.
The model is attached to the wood plank base with screws through the hull bottom, installed from the top down through the holes for the turrets. I think the 1/8 square cribbing makes an attractive and simple base.
All in all, I think it turned out pretty good. At about 20" long, its a nice size for casual viewing and, with the limited amount of small stuff hanging out, it can be dusted reasonably safely.
I'm glad I got the opportunity to build a model that will mean something to the family of a WWII veteran. It's easy to forget that there are people, places and events behind much of what we model. They shouldn't be forgotten.

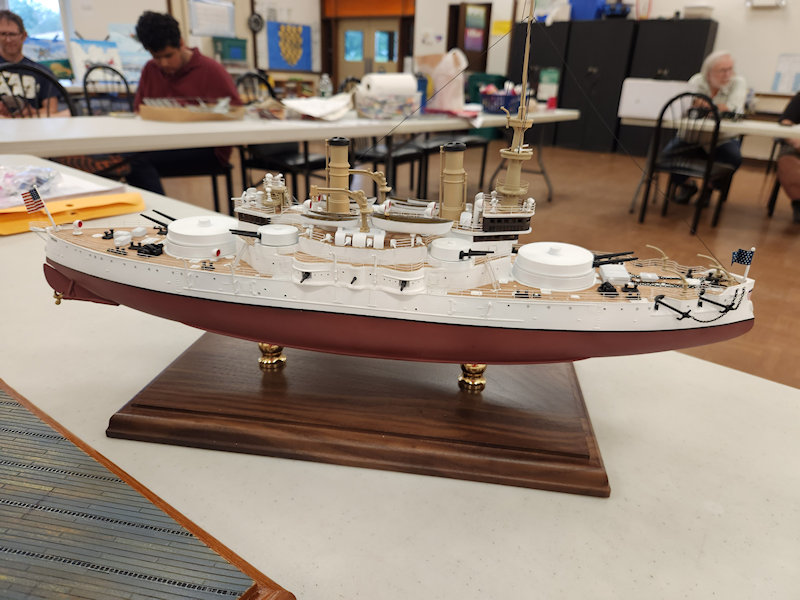
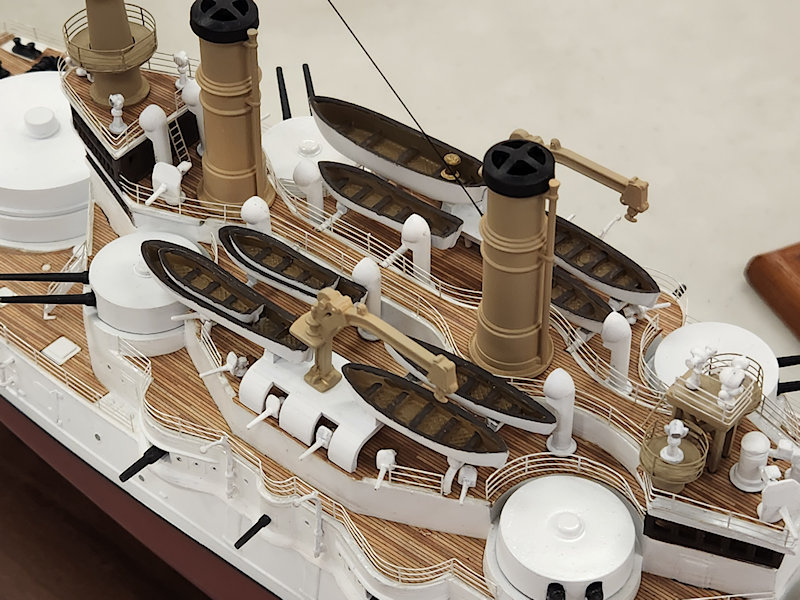
Tom Petkovsky showed us his Glenco 1/225 USS Oregon. It was finished with Ammo Mig and Tamiya paints.
Tom added aftermarket decals and 1/250 scale railings and ladders (close enough). He said there were lots
of gaps to fill during the build. Tom mentioned that he's had this kit for 20+ years, and likes the "Great
White Fleet" look.
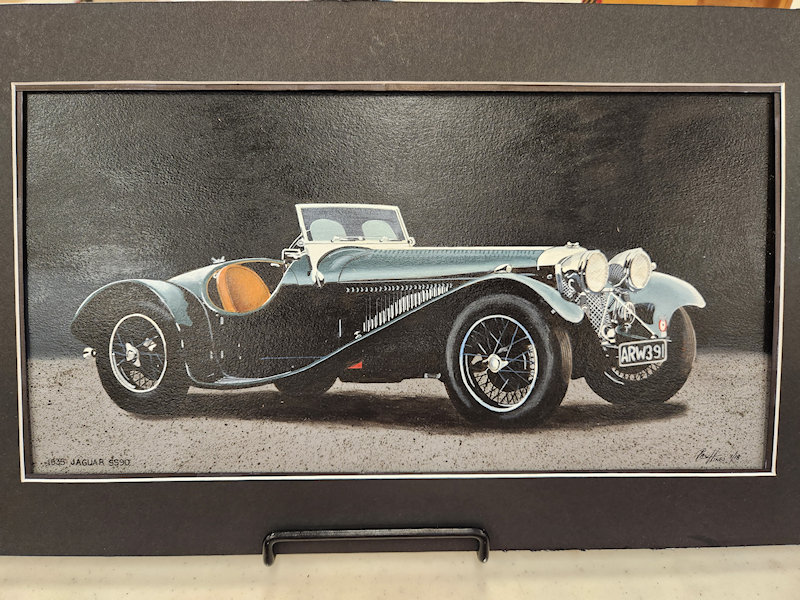
Paul Hines brought in two new paintings of automotive subjects. The first was a 1935 Jaguar SS90.
Paul said "I painted this because I love the flowing lines from the front to the rear fender. It is so
typically British. The SS90 was underpowered, so they increased the HP and the SS100 was born. I also
think the Jade Green goes perfectly on this car."
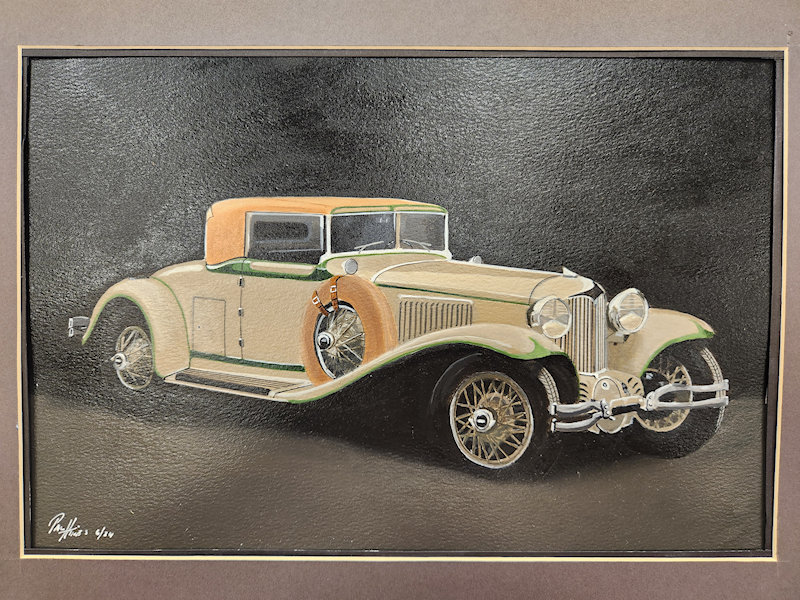
Paul's second painting was a 1929 Cord L-29 Cabriolet. Paul's comments: "Stunning design and the
first car with front wheel drive. The long, sweeping "wings" are very graceful. The car has excellent
lines with the top up or down."
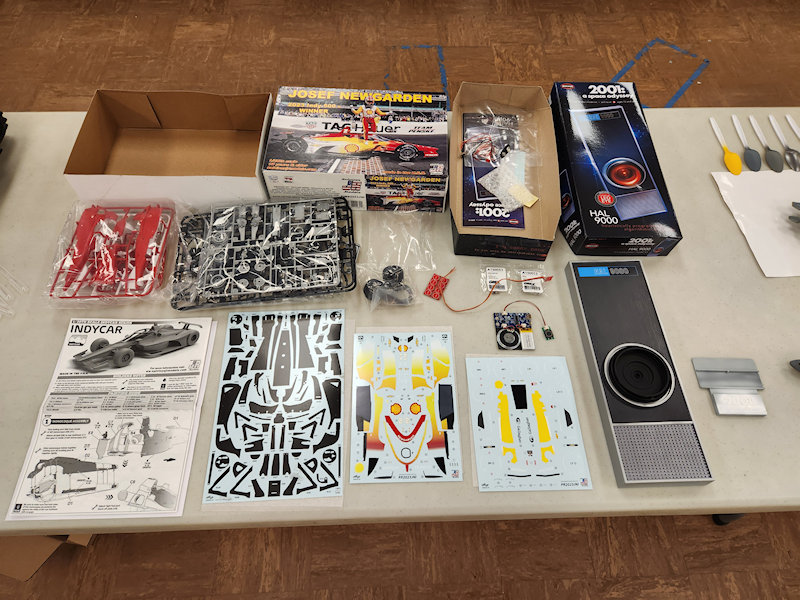
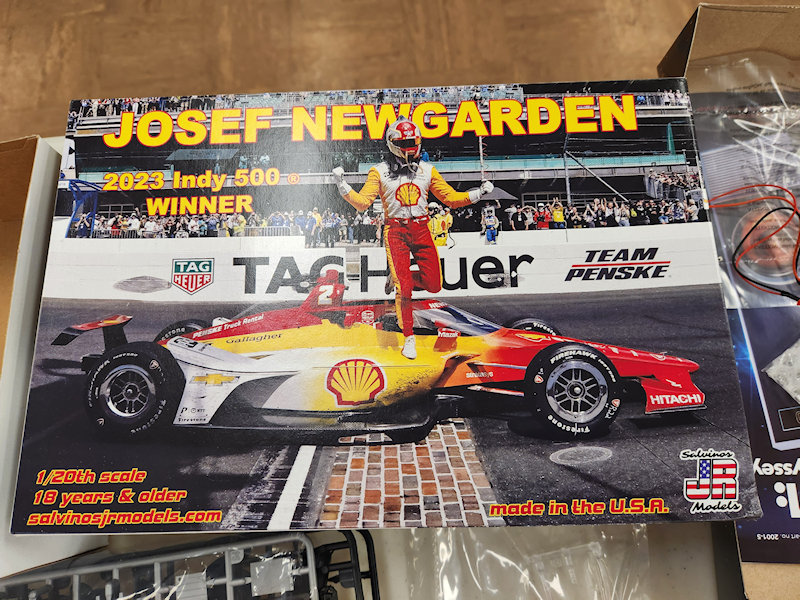
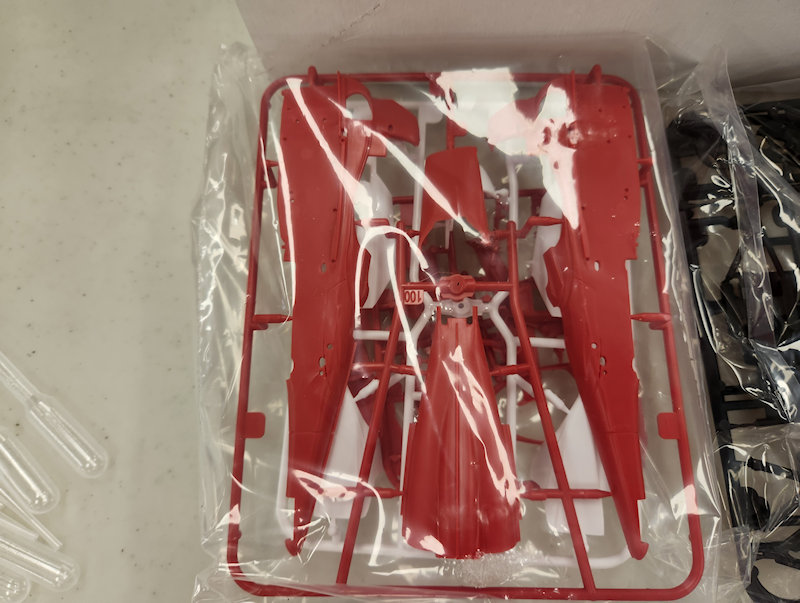
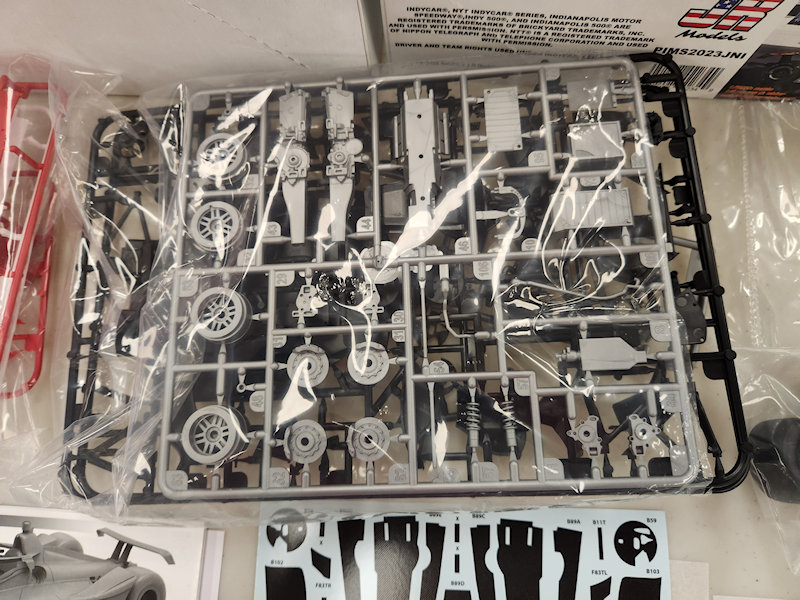
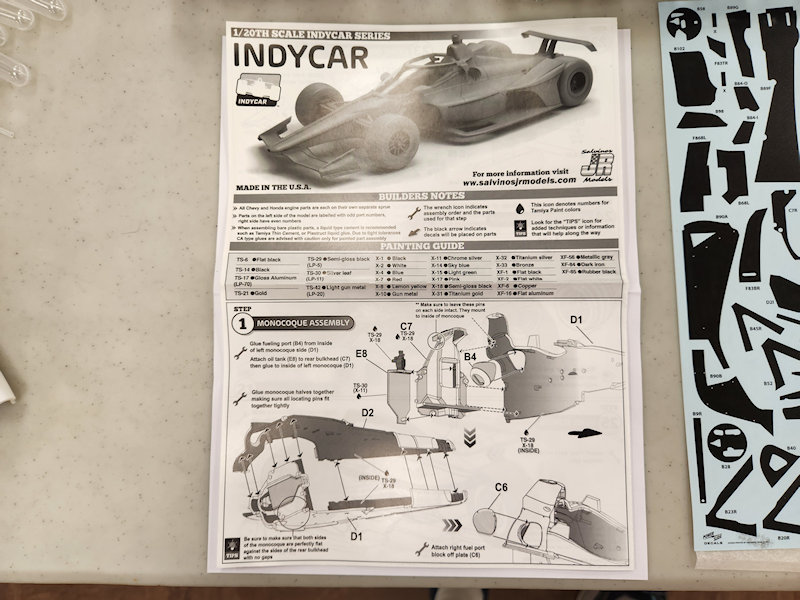
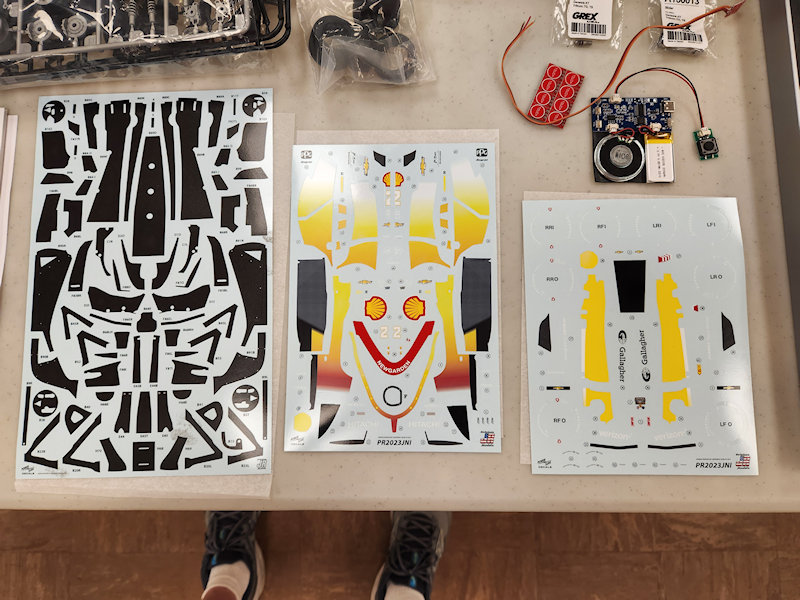
Larry Osolkowski displayed a few items this month. The first was a new kit from Salvino's JR Models
of a current Indy car in 1/20 scale, the Penske Chevy of Josef Newgarden that won the 2023 Indy 500.
The kit is very high quality, with clean molding, great detail and a full engine along with excellent
decals including a large sheet of carbon fiber. The kit instructions also look very well done. They plan
on doing a series of these kits including both Chevy and Honda engined cars.

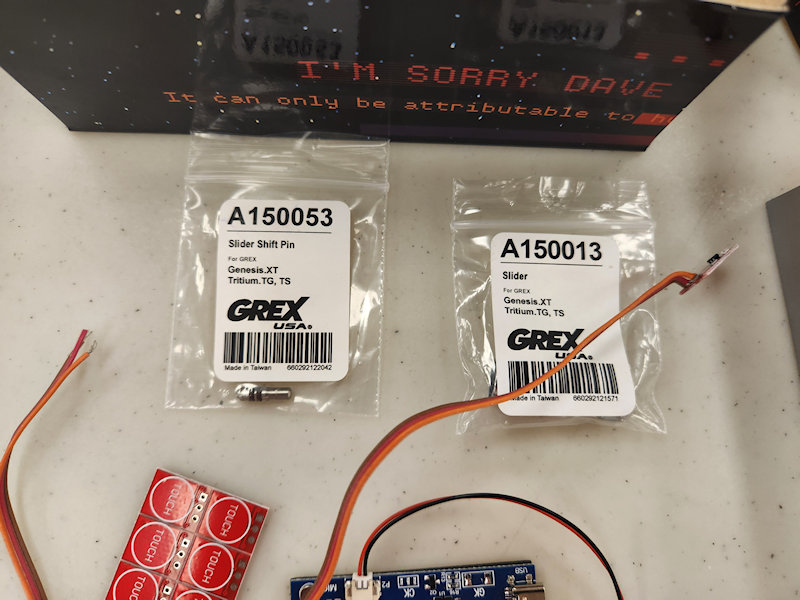
Larry's next item was a set of repair parts for his Grex Tritium airbrush. Larry gave a demo a while
back on the disassembly and cleaning of the Grex airbrush, which will be repeated sometime this summer.
He said he noticed some issues with the operation of the airbrush, and determined that the slider inside
the airbrush body had a groove worn in it from the air valve plunger. Repair parts were less than $20,
and fixed the problem, but it appears that the contact point of the plunger on the slider needs regular
lubrication to prevent this wear.
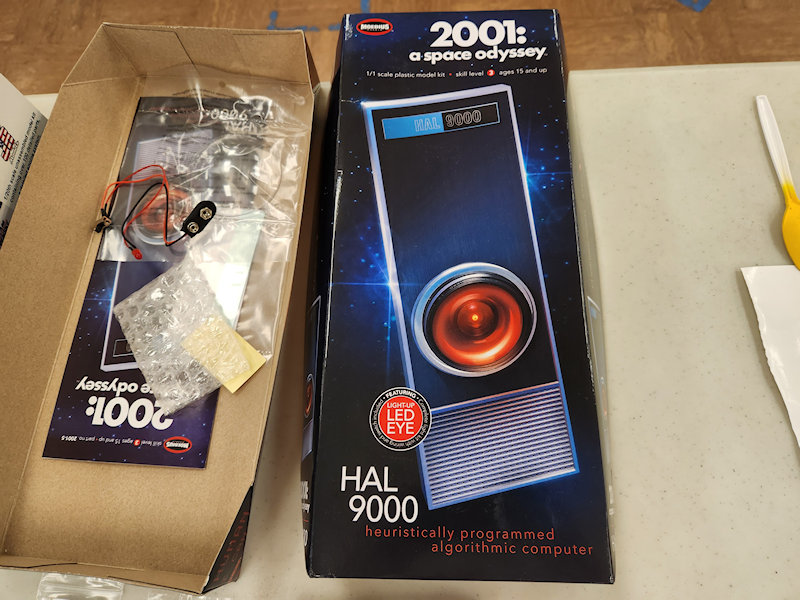
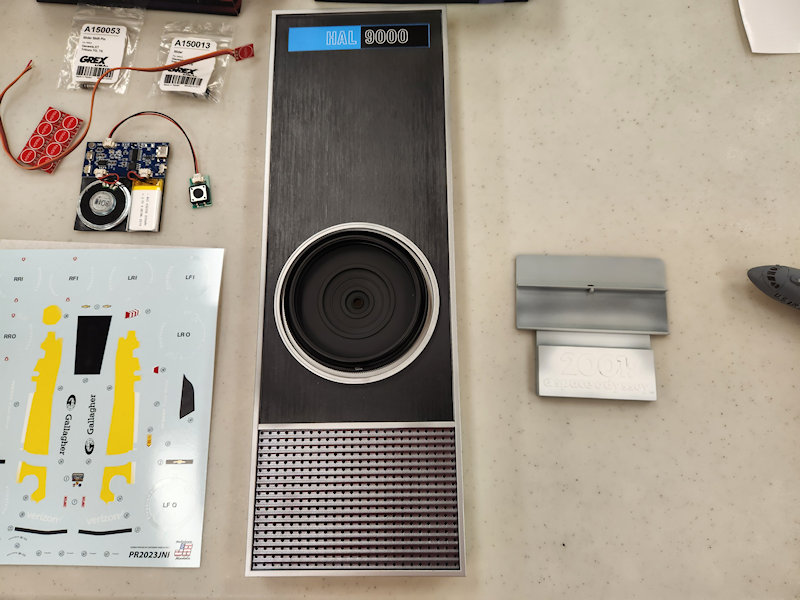
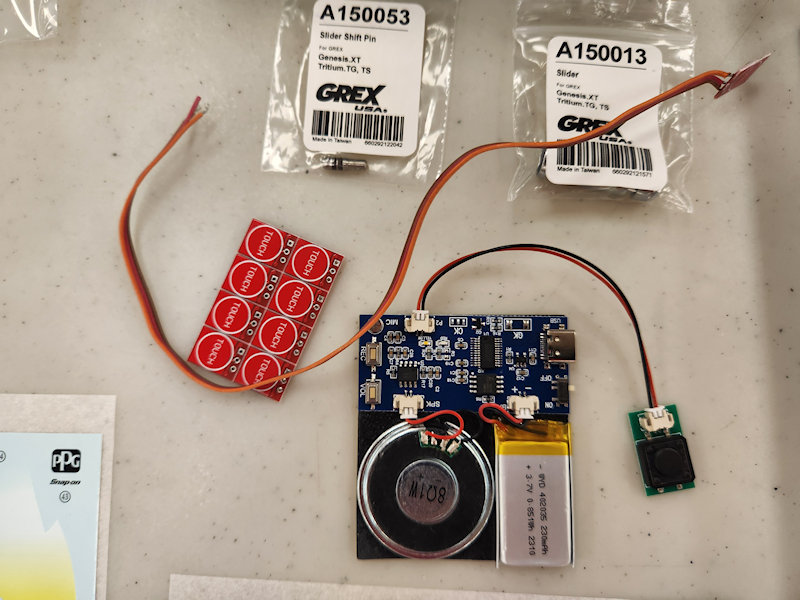
Larry's last item was the progress on his Tony Bartozek Challenge model, a Moebius 1/1 Hal 9000
Computer panel from the movie 2001: a space odyssey. He has the panel painted with Alclad aluminum for
the frame, Tamiya LP-40 Metallic Black from the new line of lacquer paints, LP-20 Light Gun Metal for
the speaker grill, Alclad white aluminum for the lens outer ring and flat black for the lens base. Larry
decided to add a digital sound board with a recording of the famous "I'm sorry Dave, I'm afraid I can't
do that" line from the movie, and will be using a touch-sensitive switch hidden under the model base to
trigger the recording.
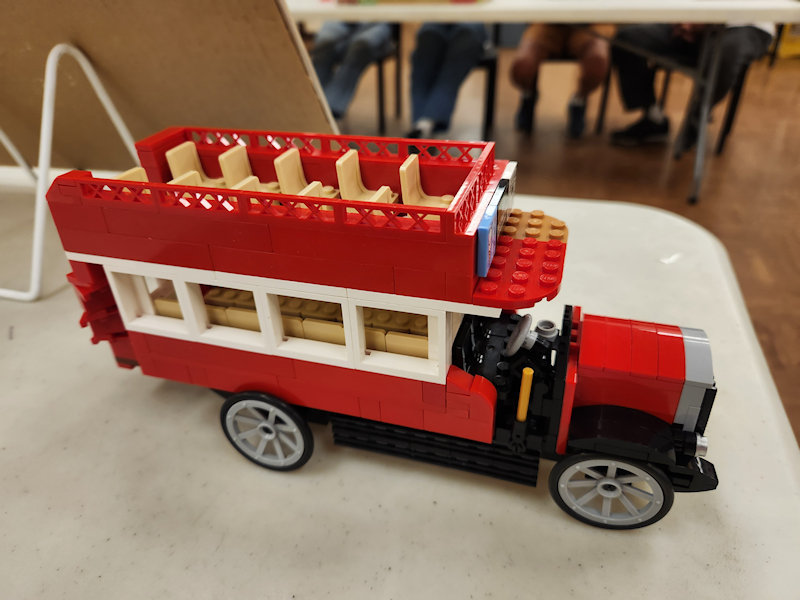
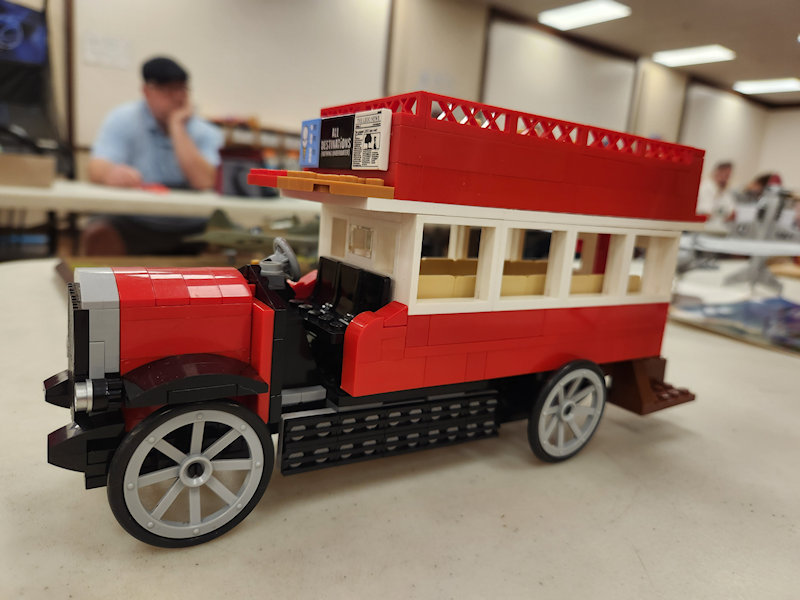
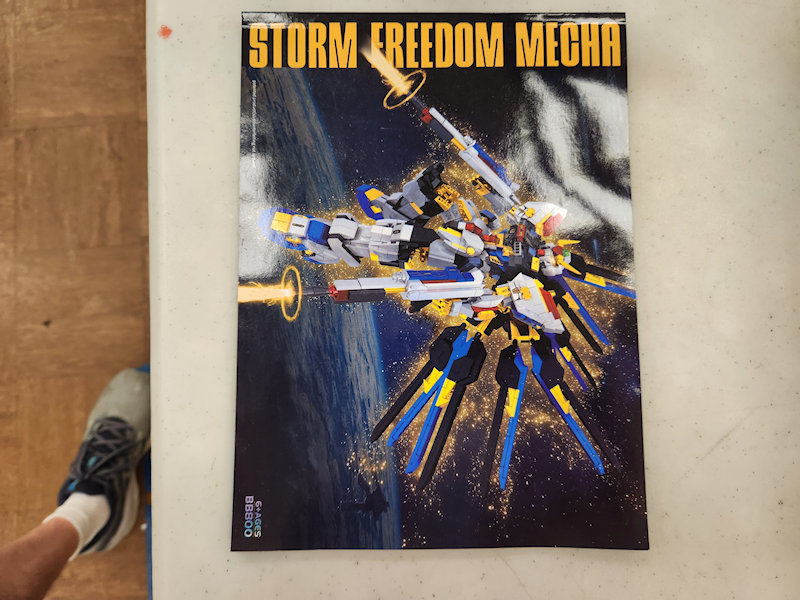
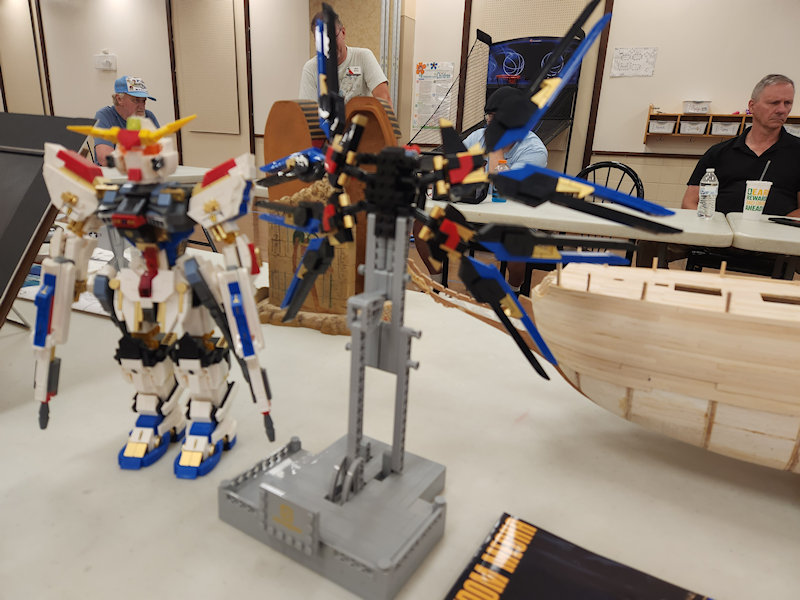
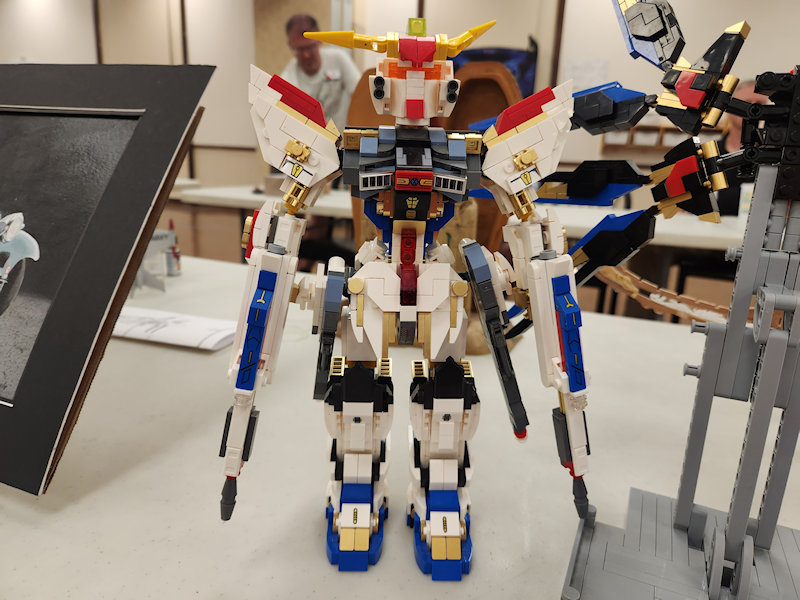
Alan Gryfe displayed his model of a London General "B" type bus in approximately 1/32 scale. It's
an MOC (My Own Creation) built from Legos using internet photos for inspiration.
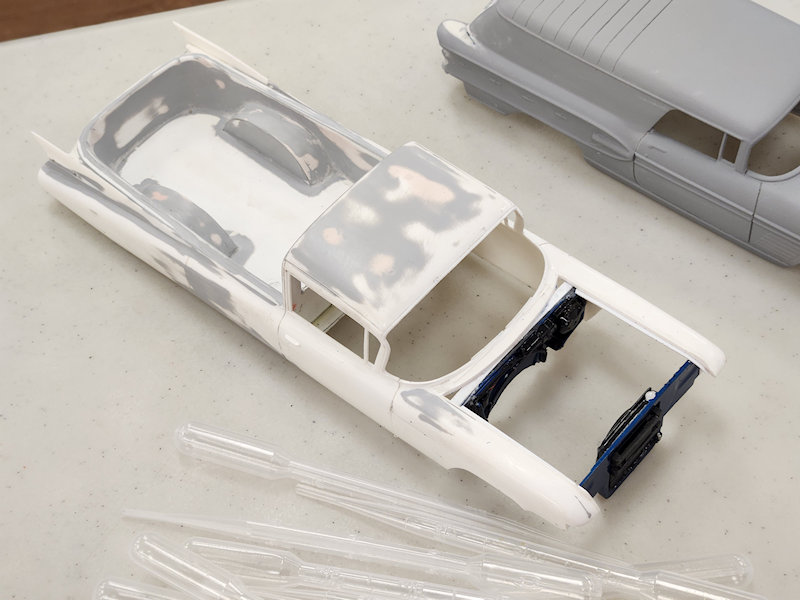
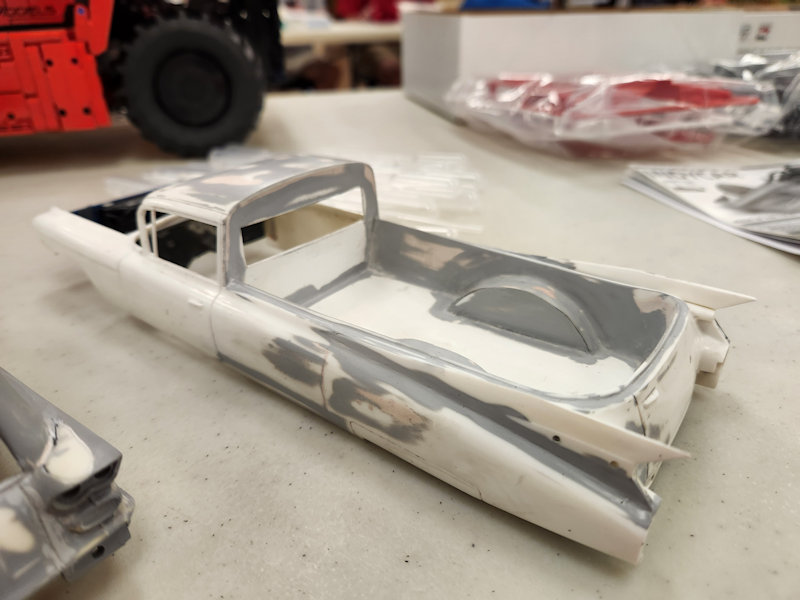
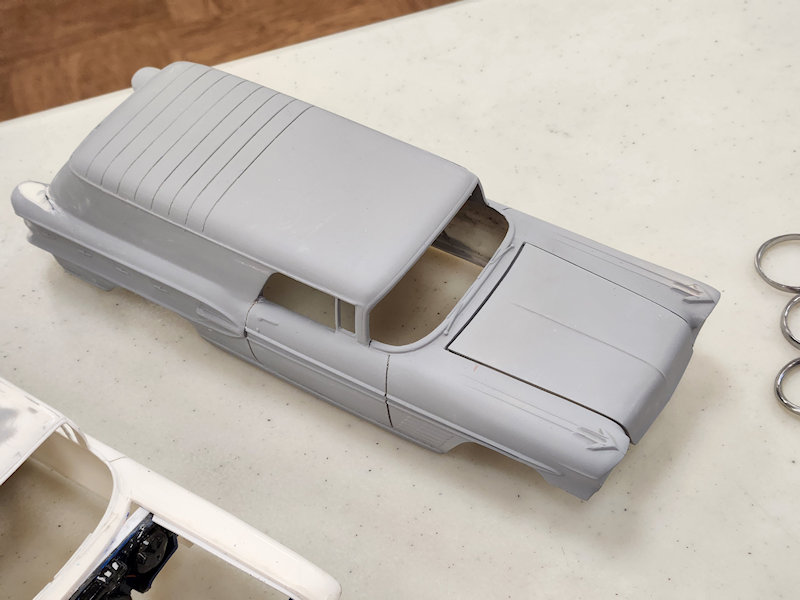
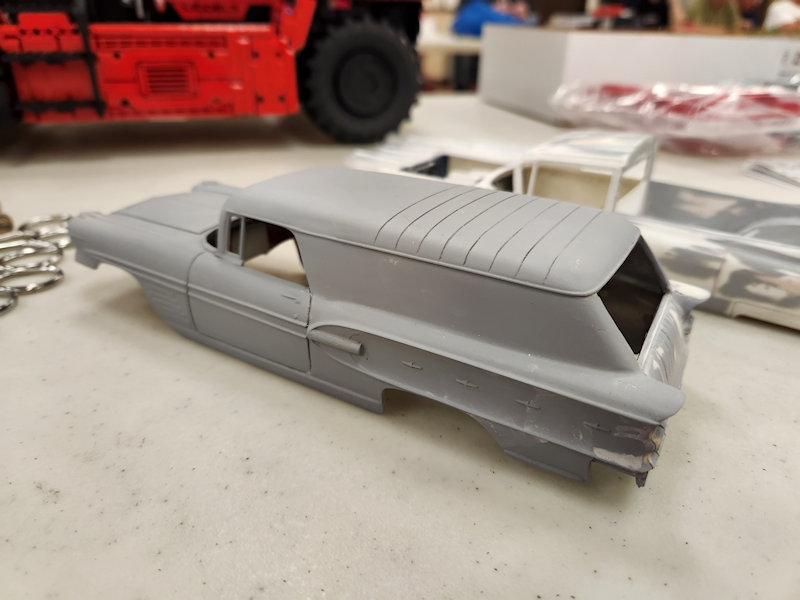
Ron Mikol showed us two current projects in progress. The first was a '59 Caddy Pickup, which
started out as a Ghost Busters kit, but with serious modifications. The second was a '58 Pontiac
Sedan Delivery, which is based on a Bonneville Convertible with heavy modification.
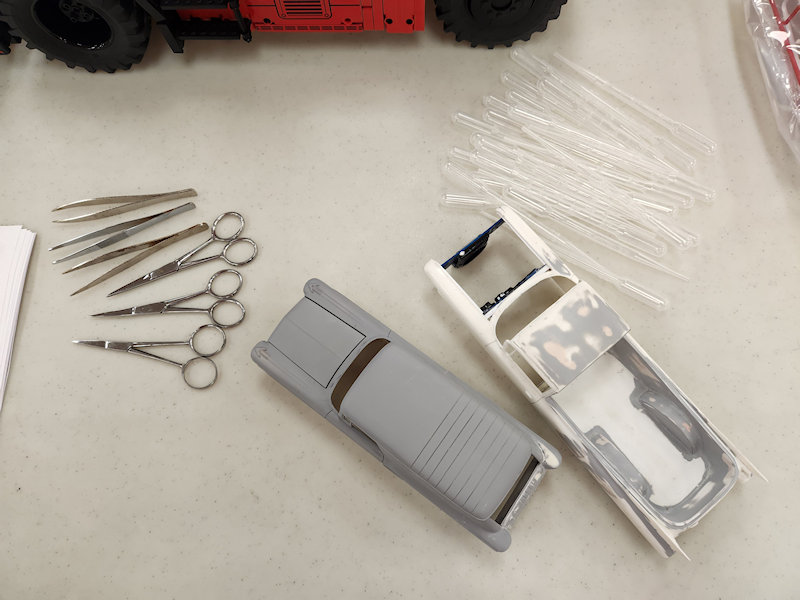
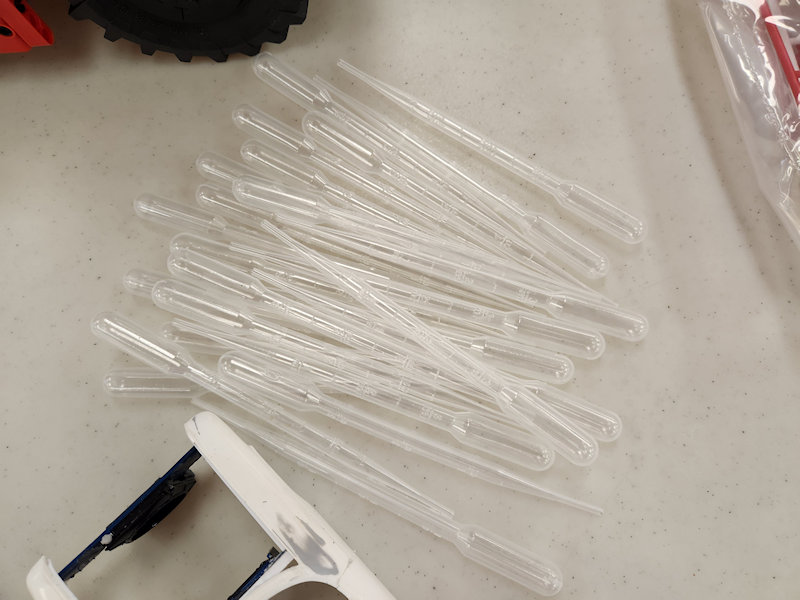
Ron also brought in some tweezers, small scissors and plastic pipettes that were free to anyone
that wanted them.

Bob Conshafter displayed his Academy 1/144 F-15 Eagle. Bob's article earlier in this newsletter
goes into detail describing the build of this model.
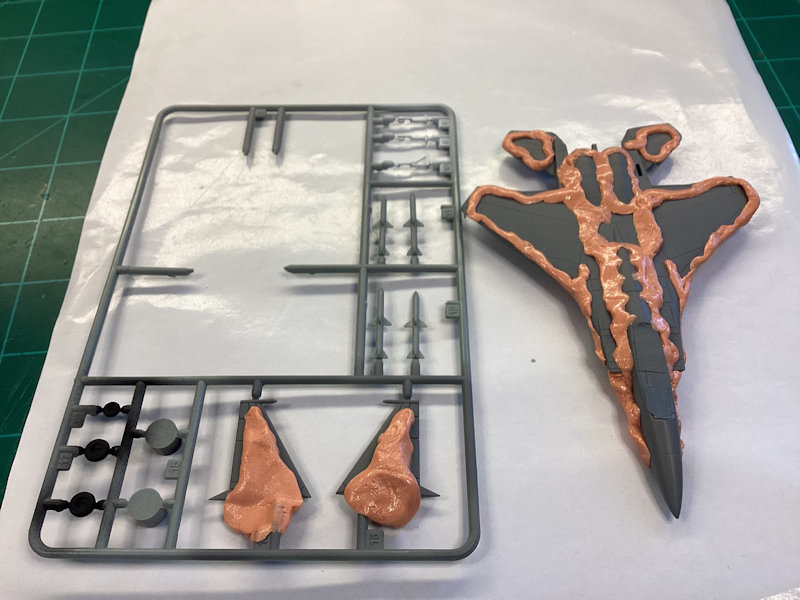
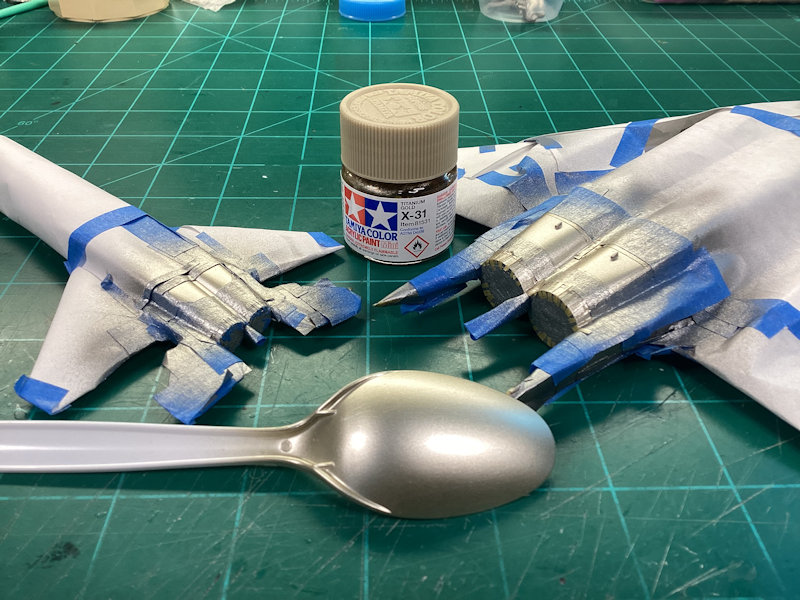
Dick Schulenberg had two models on display on the tables. The first was a 1/72 Valom Lockheed XV-1
vertical take-off turboprop fighter prototype. He used Vallejo RLM01 Silber (metallic) and Vallejo Red
over Tamiya fine gray primer, all airbrushed. The final finish was Vallejo Satin, although Dick isn't
sure he likes the effect. Dick said this is a crude kit with poor instructions, and required heavy
rework of the area of the fuselage under the canopy to correct a nonexistant hump that was discovered
too late in construction to fix. This caused the canopy to sit about 1/8 - 3/16" too high, and Dick
didn't notice the problem until the canopy was glued in place and the plane painted and decaled.
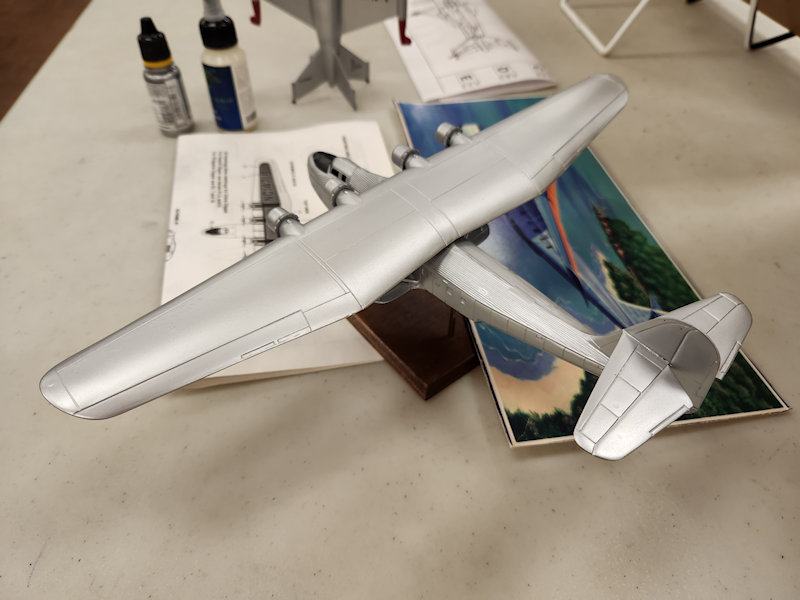
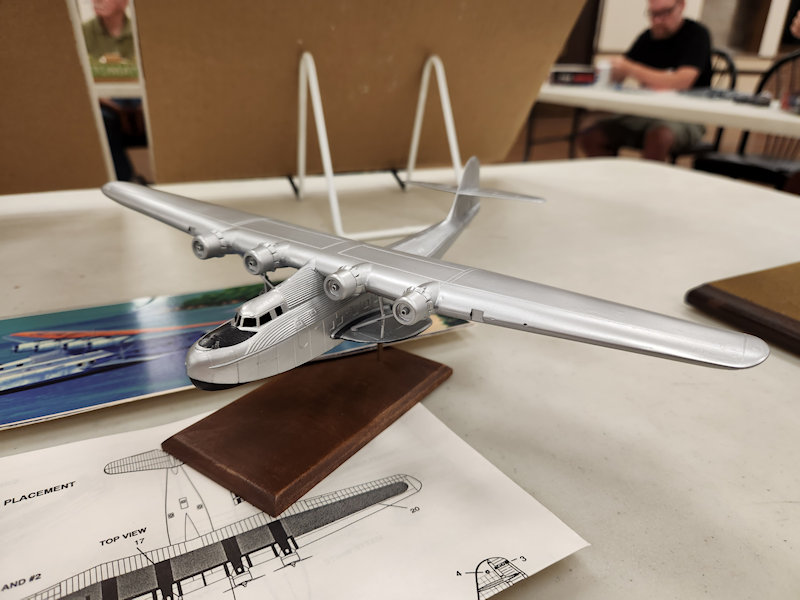
Dick's second model was a box scale Glencoe Martin M-130 flying boat. He mentioned that the box says
1/144, but it's really 1/133. Dick used Vallejo Model Air RLM01 Silber over Tamiya spray gray; he added
that the Vallejo sprays great. He added more cleats on the inside of a long seam, but it's otherwise
built out of box, with no weathering. Dick said he planned on using the kit decals for the large orange
areas, but the one with the N number broke up badly even with 3 coats of Micro Decal film, so he needs
to print up some new ones. He picked the subject because it's a pretty airplane; shame about the scale.
Dick added that this is a late '50s kit, originally by Strombecker, based on their WW II era solid wood
kit. It was repopped by Glencoe in 1992 and never again. He thought the decals were probably good 30
years ago.
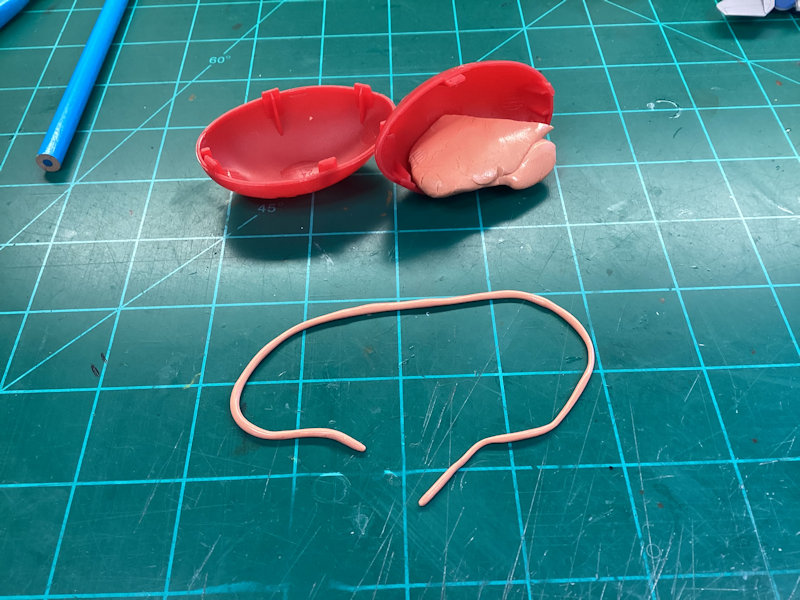
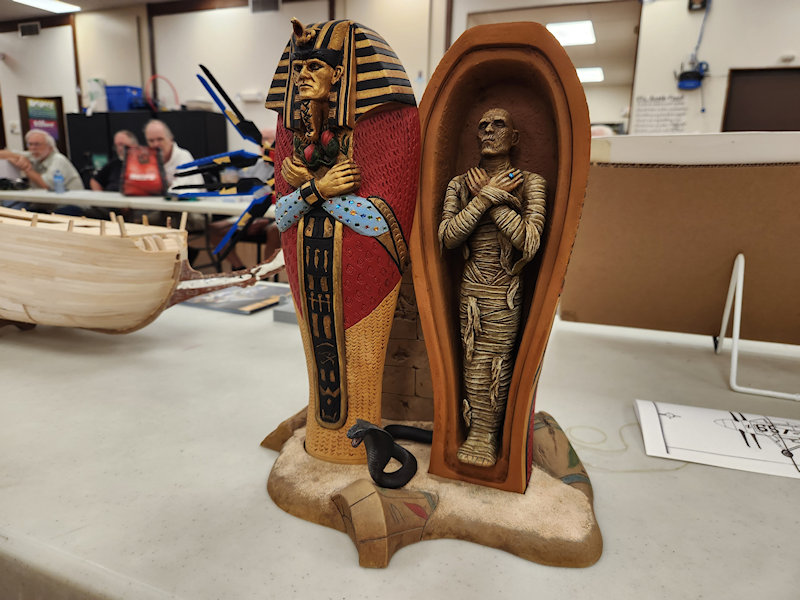
Bob Heiss displayed his Mummy model by Moebius in 1/8 scale. He used Krylon gray auto primer, and
Vallejo and Badger paints plus Windsor and Newton watercolors for the hieroglyphs and Tamiya clear
acrylic for the gemstones. Raw umber and black oils were added for a wash. Bob said he scratch-built
the sarcophagus' beard and head dress snake with Apoxie Sculpt, and made the gem stones using aluminum
foil pressed into the recesses and painting them with Tamiya transparent colors. He used a vinyl paint
masking set to assist with the details.

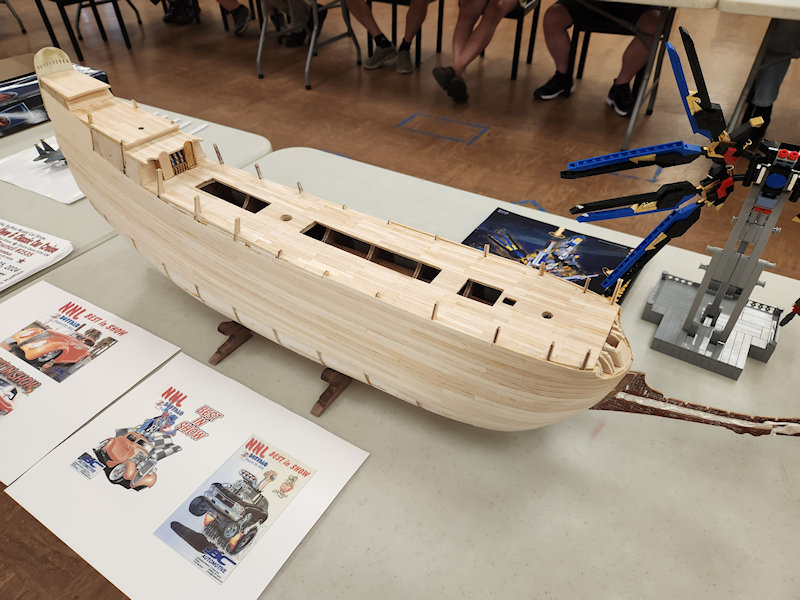
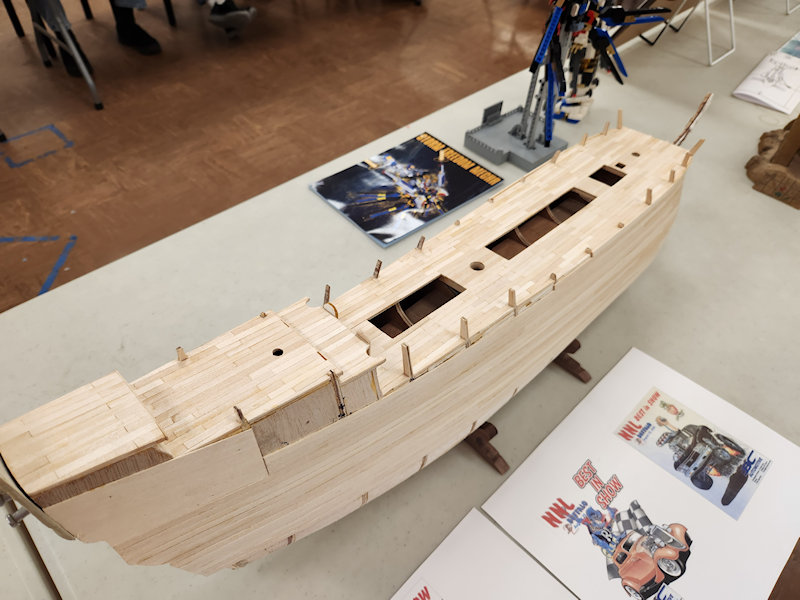
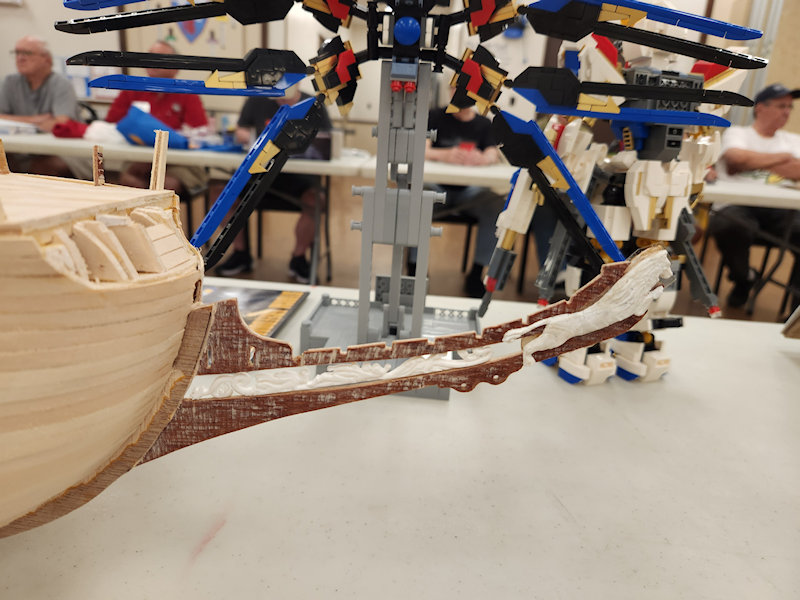
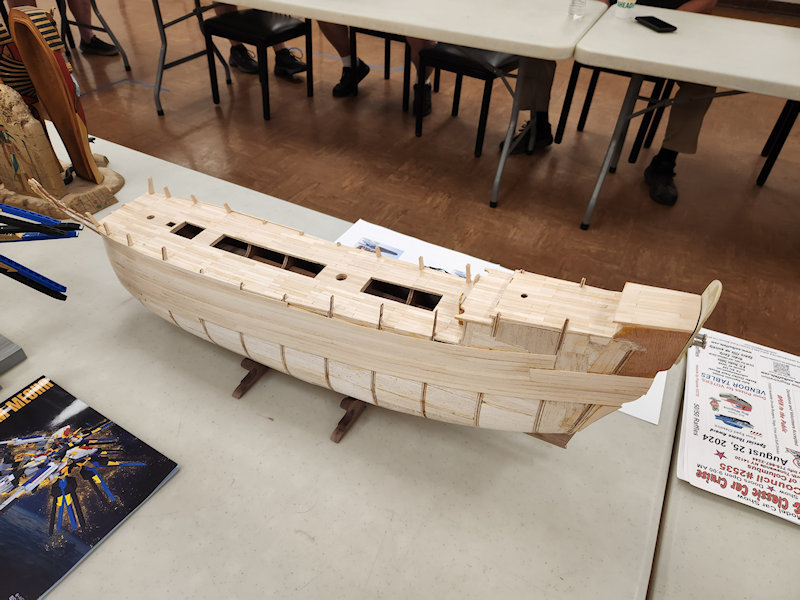
Paul Kittell showed us his latest work-in-progress, a 1/75 WASA being built using Billin Boats plans.
Paul said he's scratch-building using their plans with a lot of modifications because "their construction
method sucks." Paul said he picked the subject because he has a lot of free time and a lack of common sense.
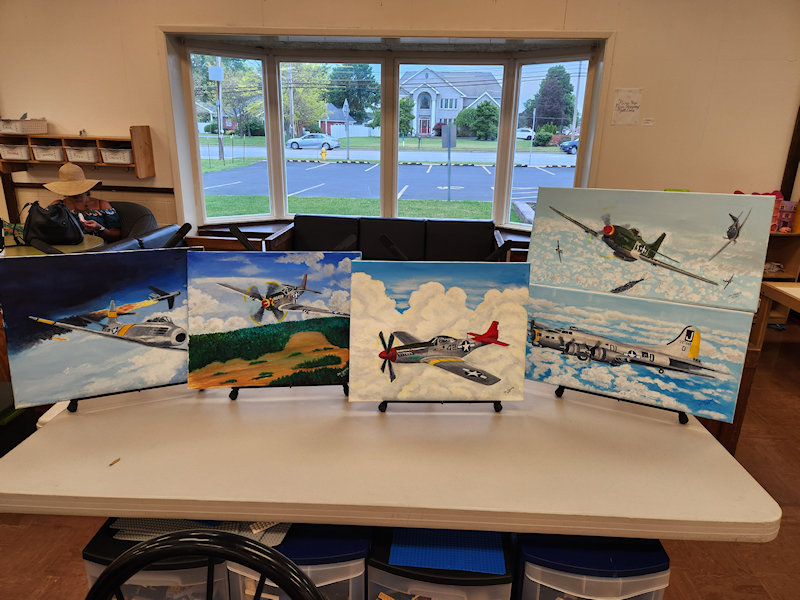
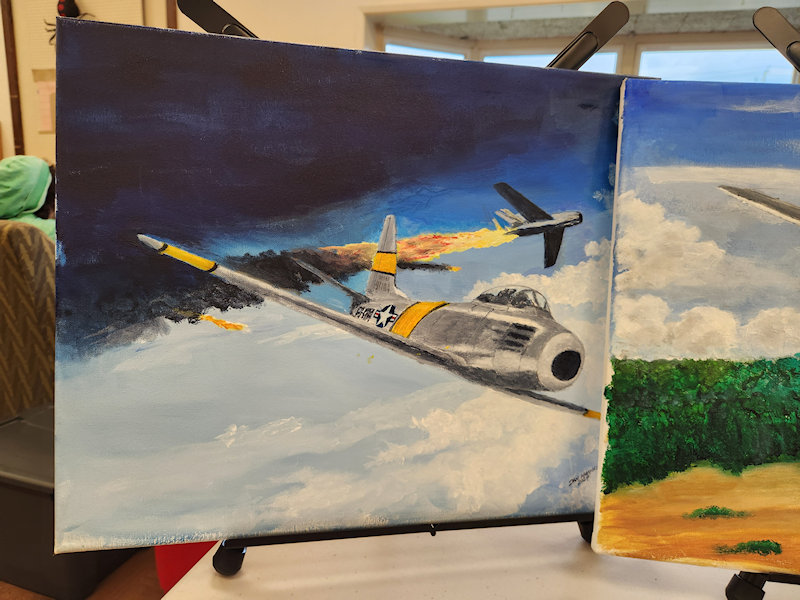
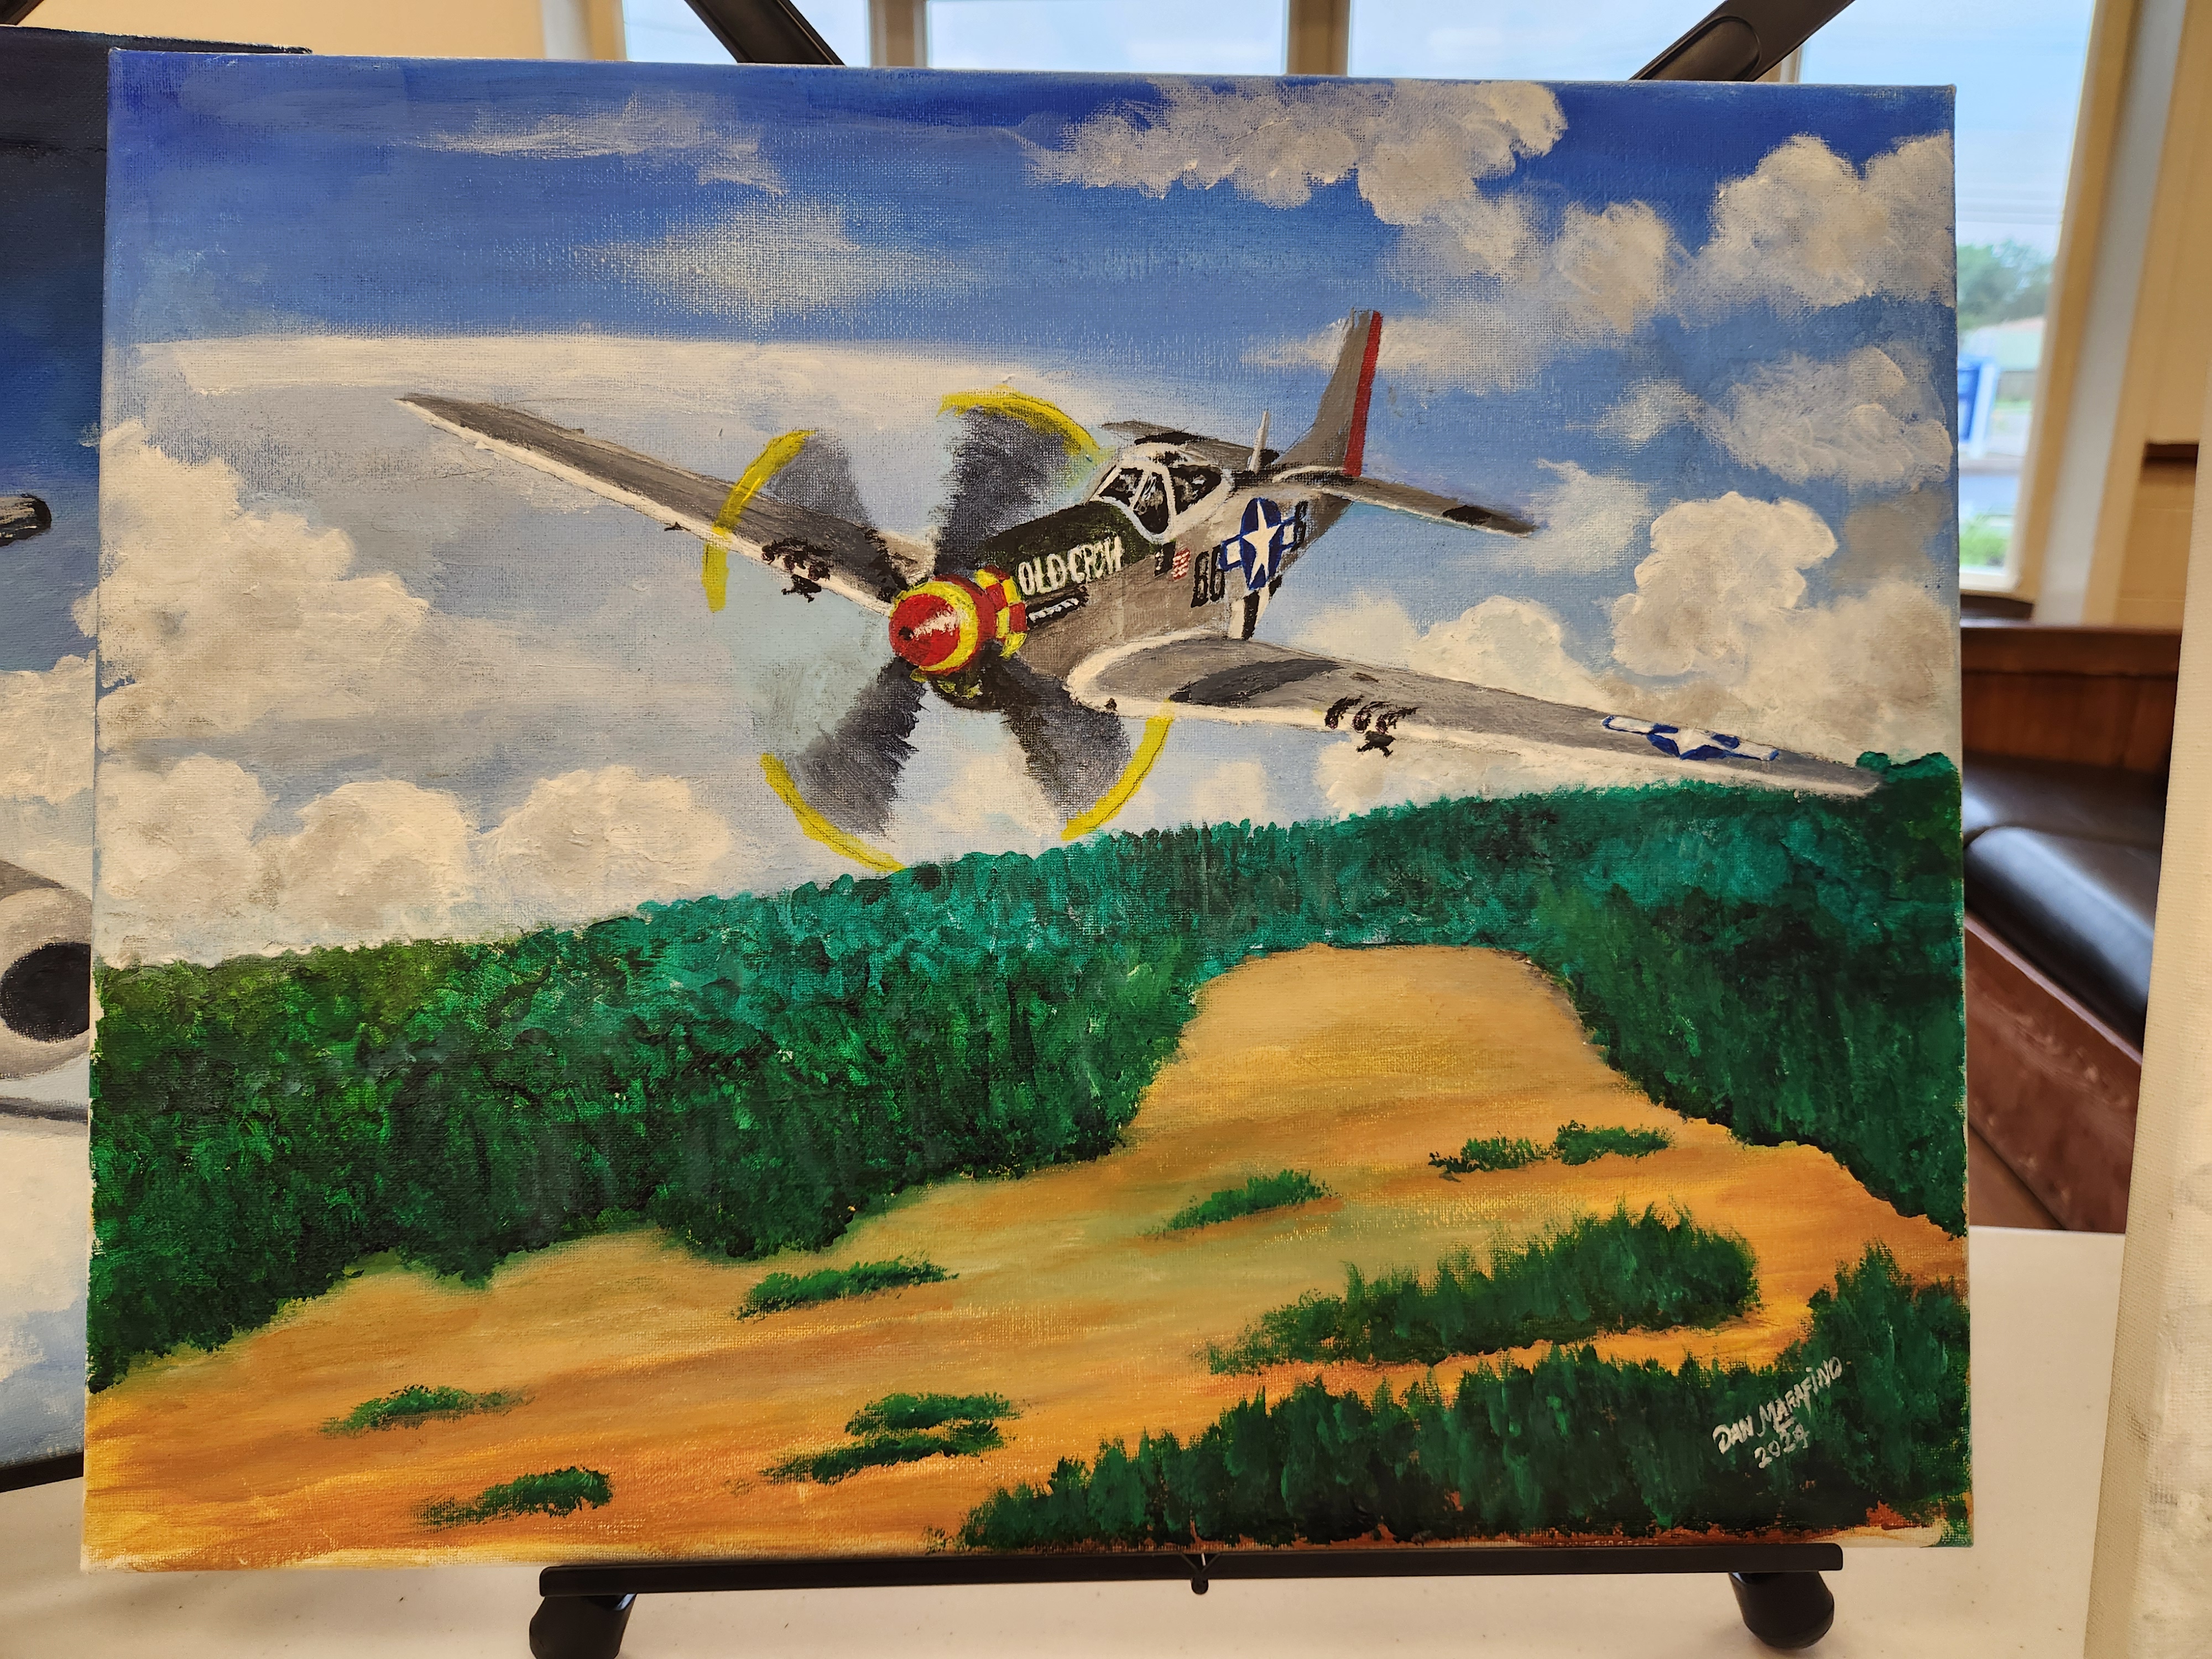
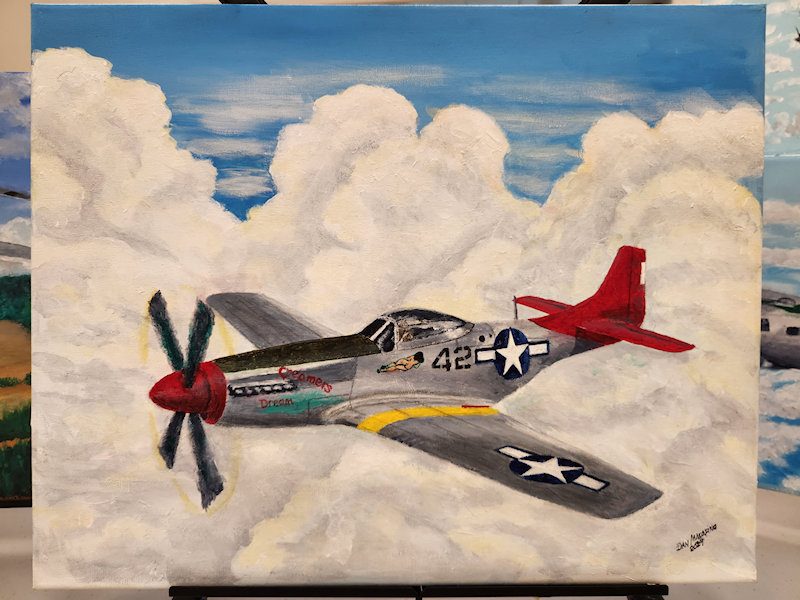
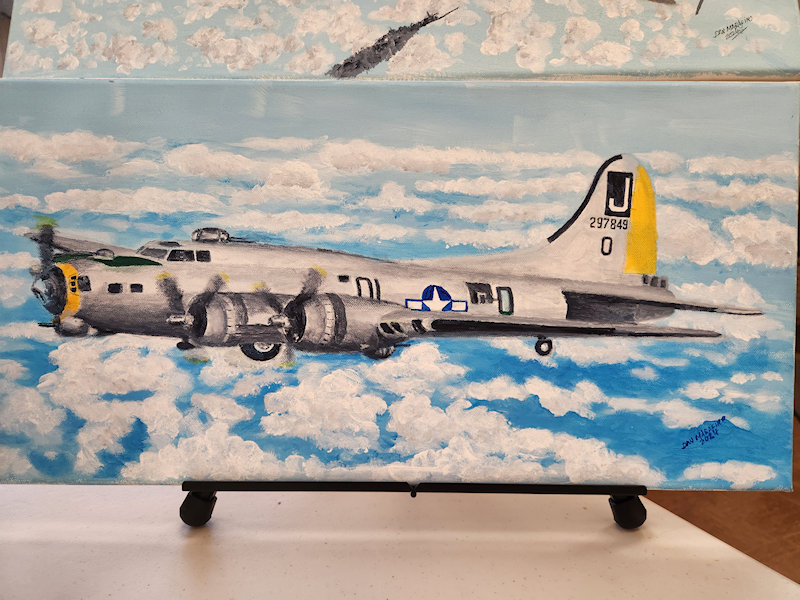
Dan Marafino displayed a collection of aircraft paintings which are for sale.
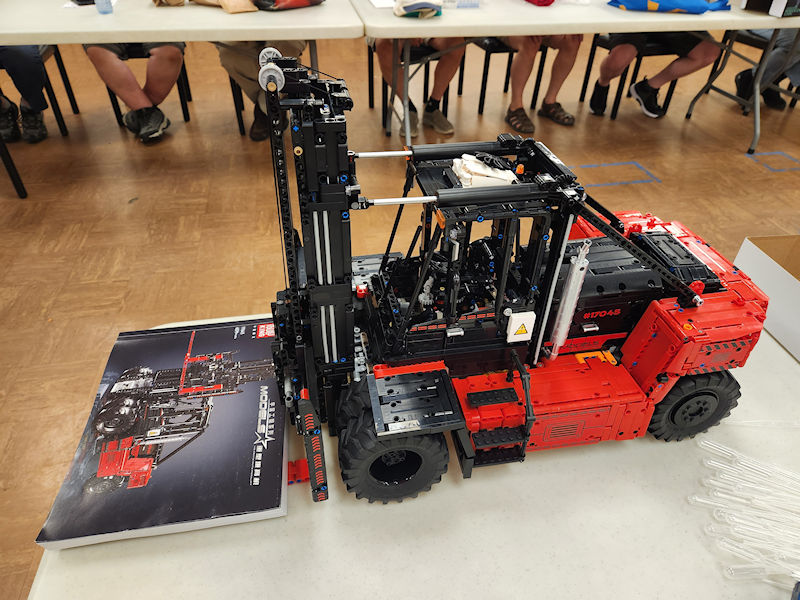
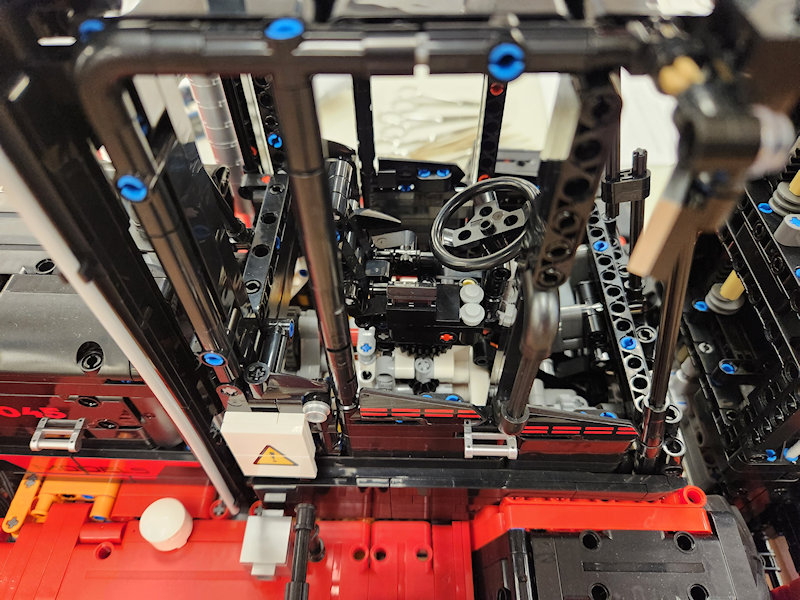
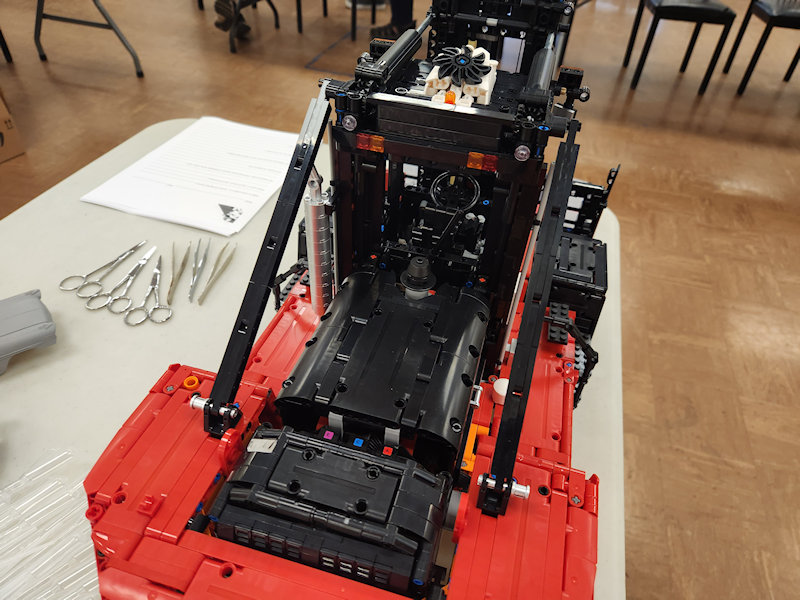
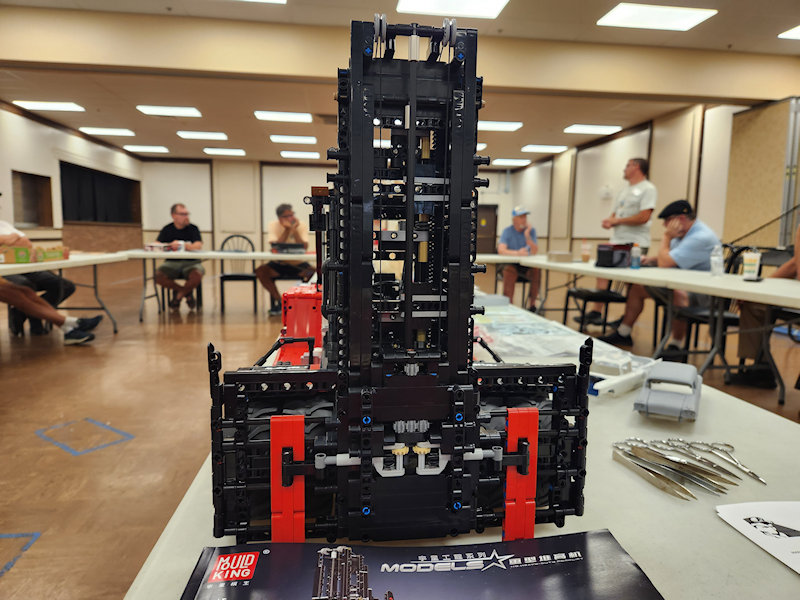
Ted Szczesny showed us his Mould King (Lego compatible) Heavy Duty Fork Lift, with 4579 parts and
5 motors. Ted said the kit comes with an app-driven RC controller system, which he replaced with a
more conventional analog controller, since he's not a big fan of phone app control systems. He said he
picked the subject because "no sprue, no glue, no screw - basically a puzzle with instructions." Ted
added that the kit is a Lego-compatible "Technic"-style kit, using pin and beam construction rather
than the more common brick and block style.

There were a few unidentified objects on the tables.
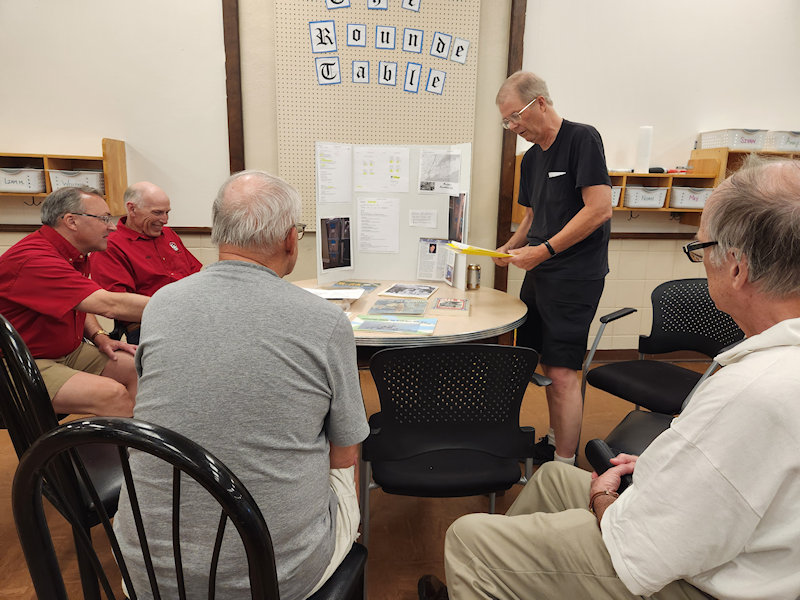
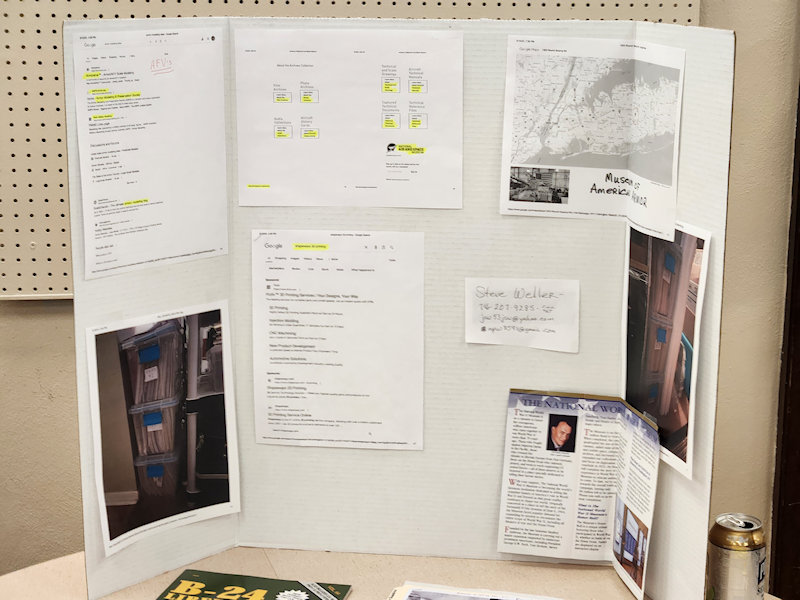
Steve Weller gave a demo on doing research for a model project.
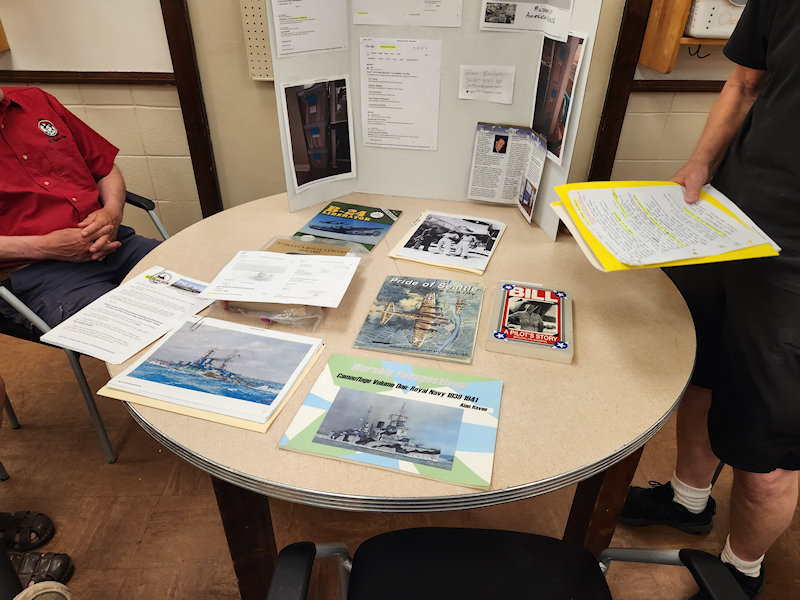
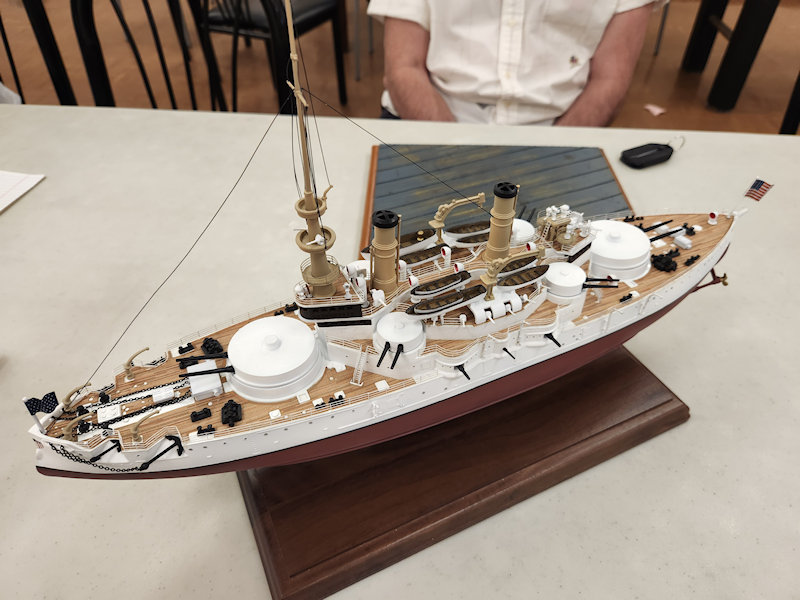
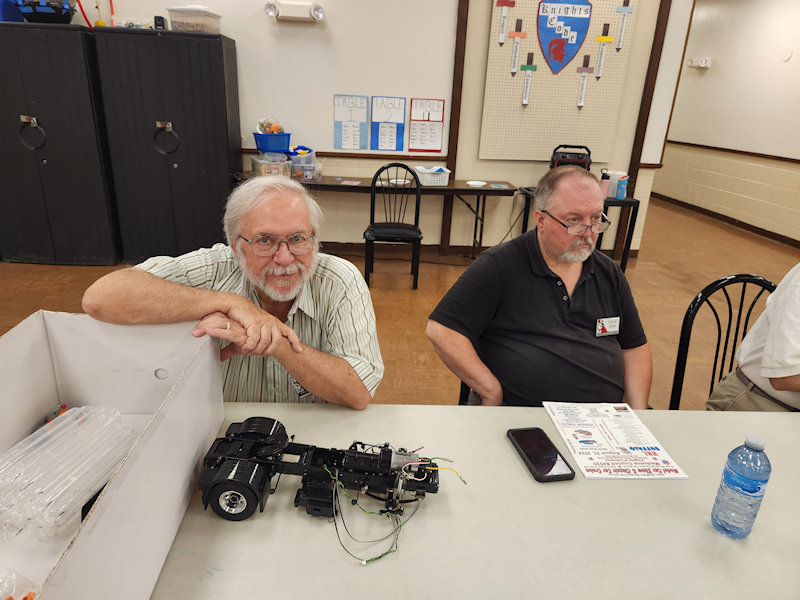
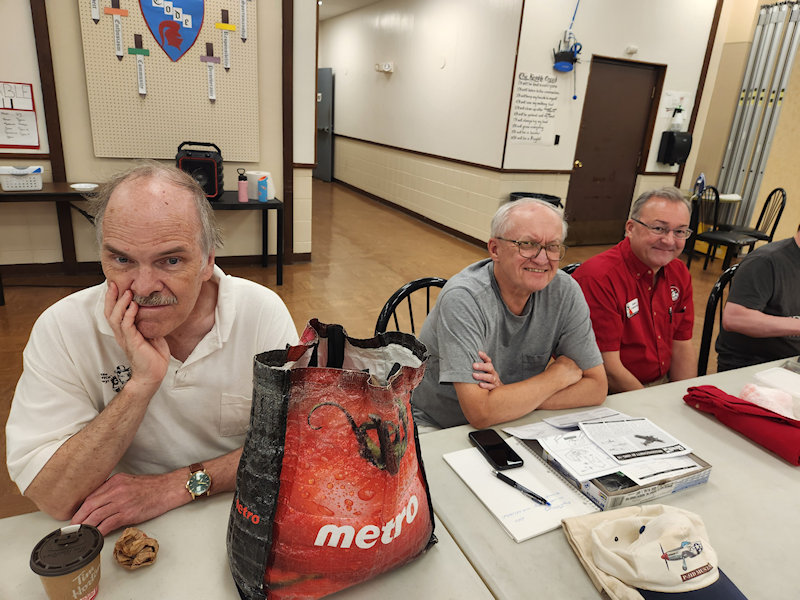
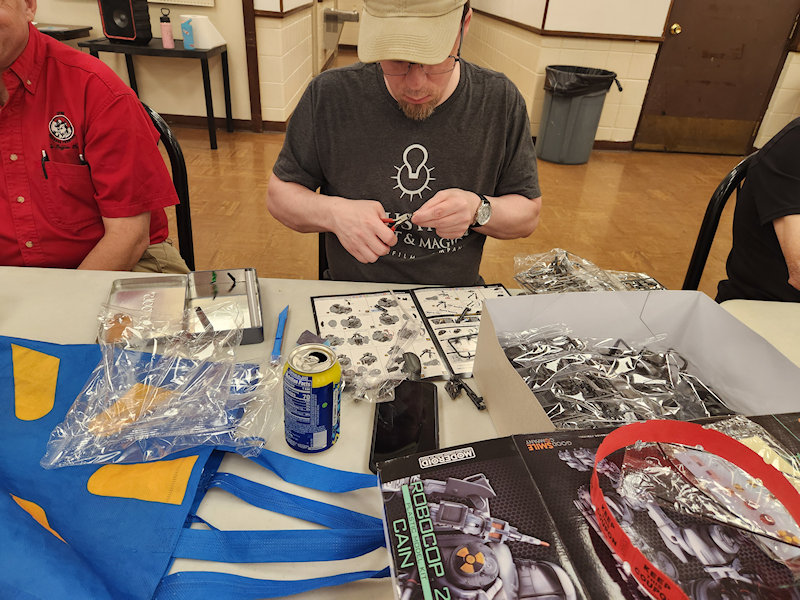
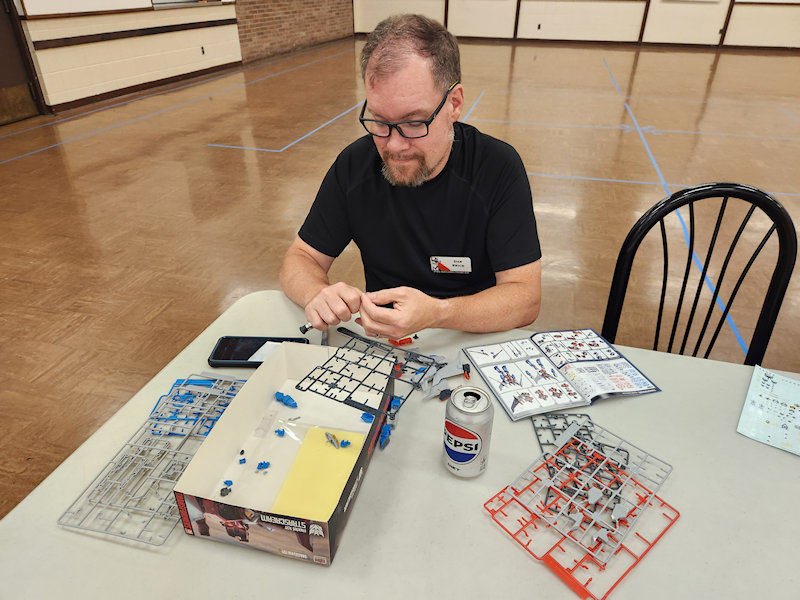
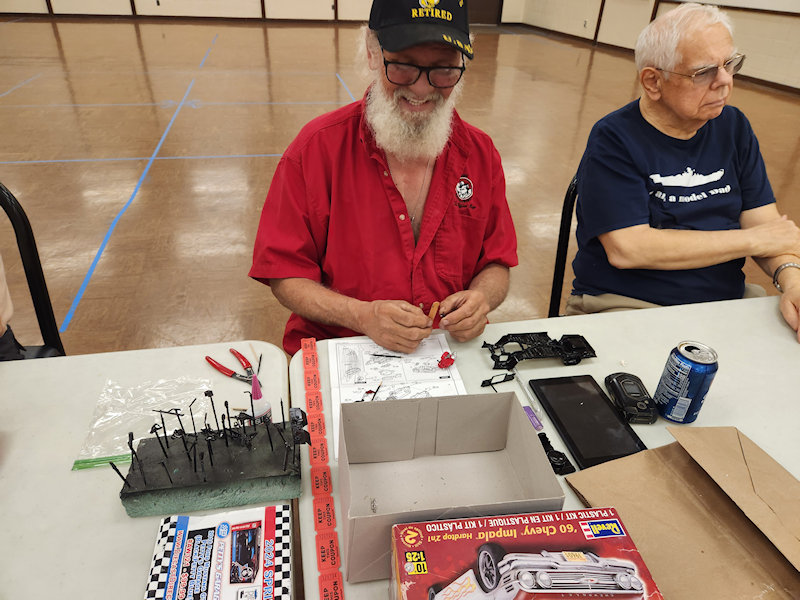
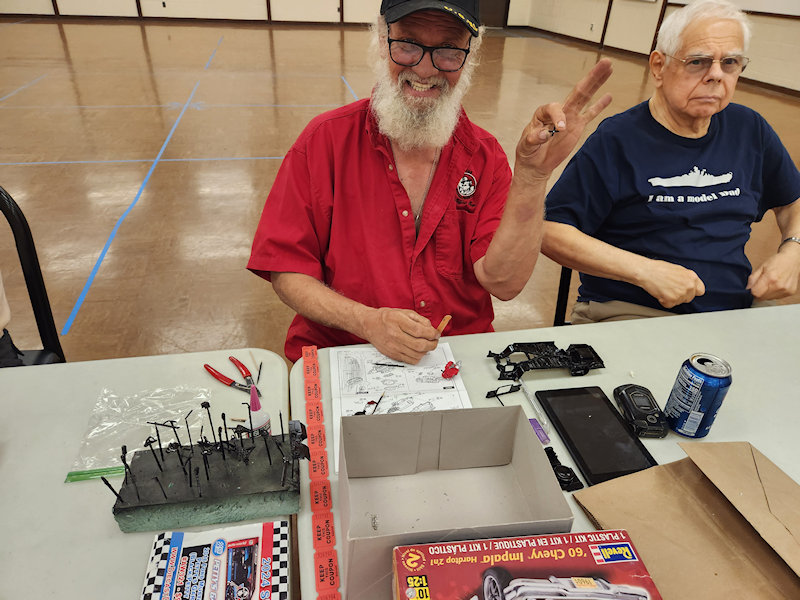
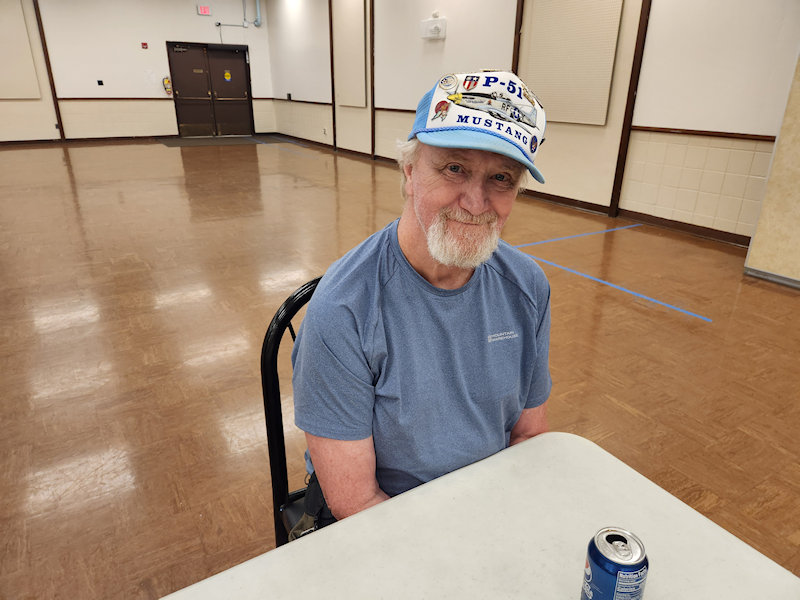
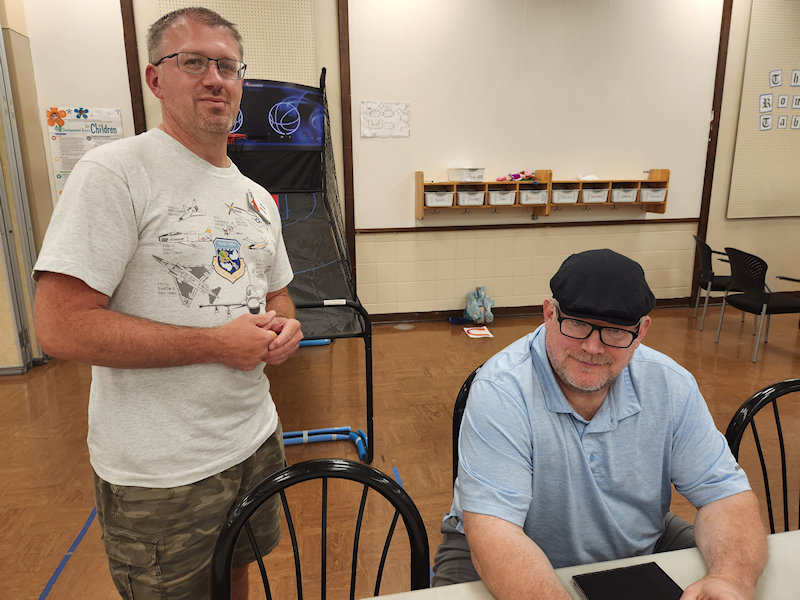
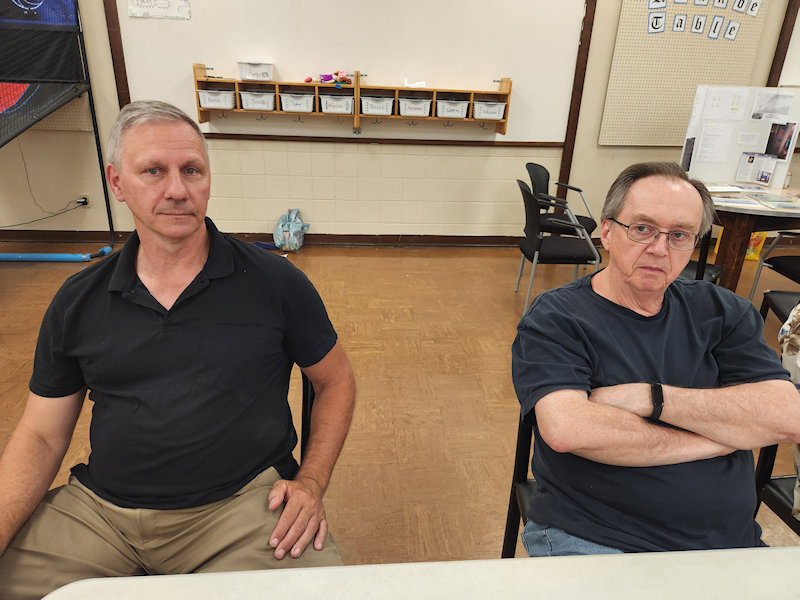
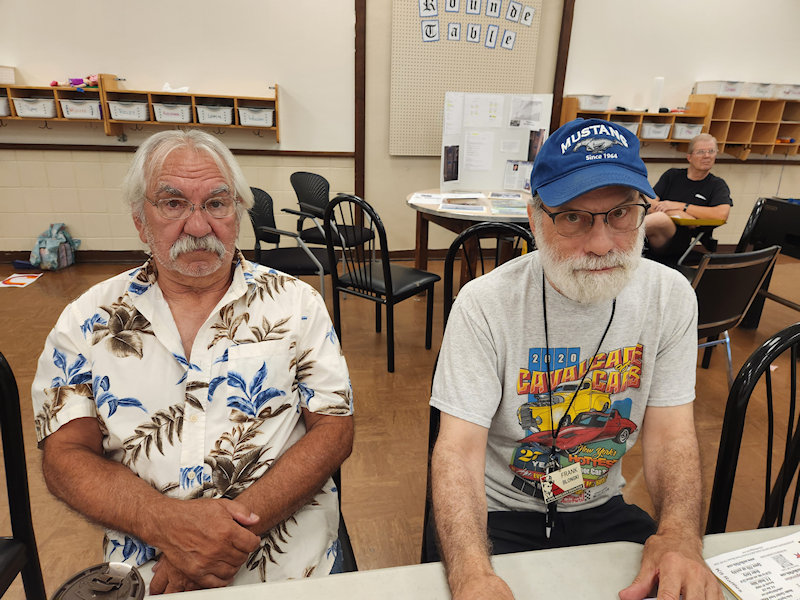
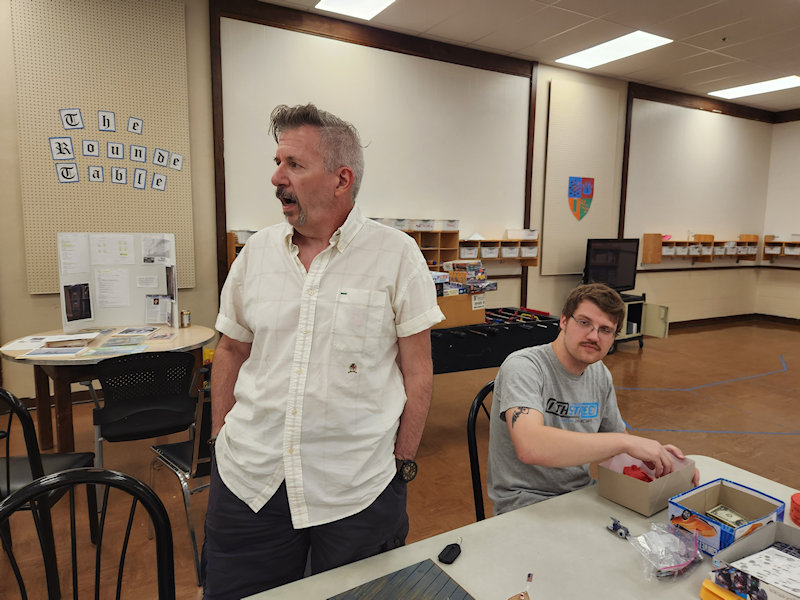
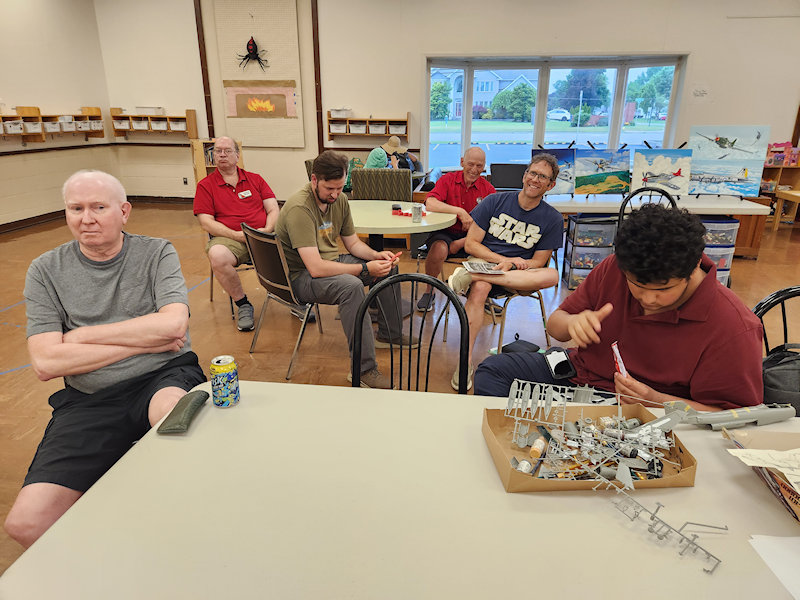
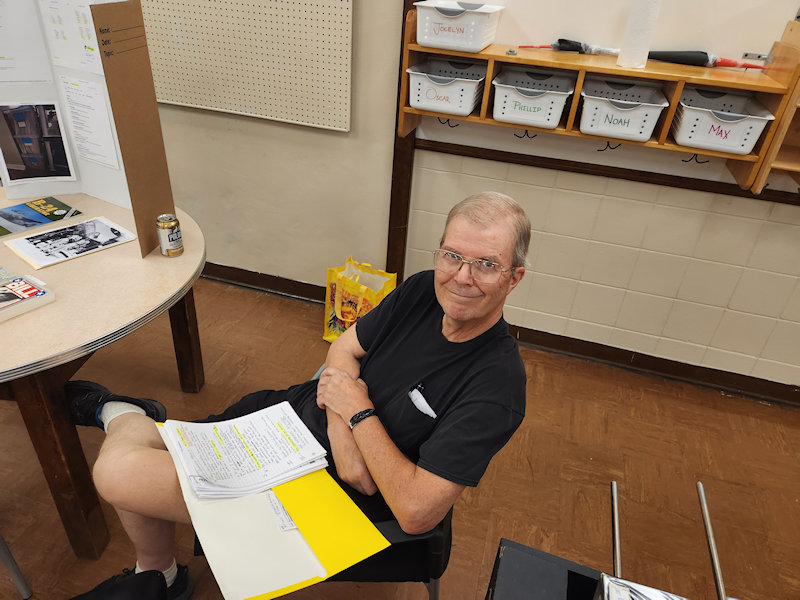
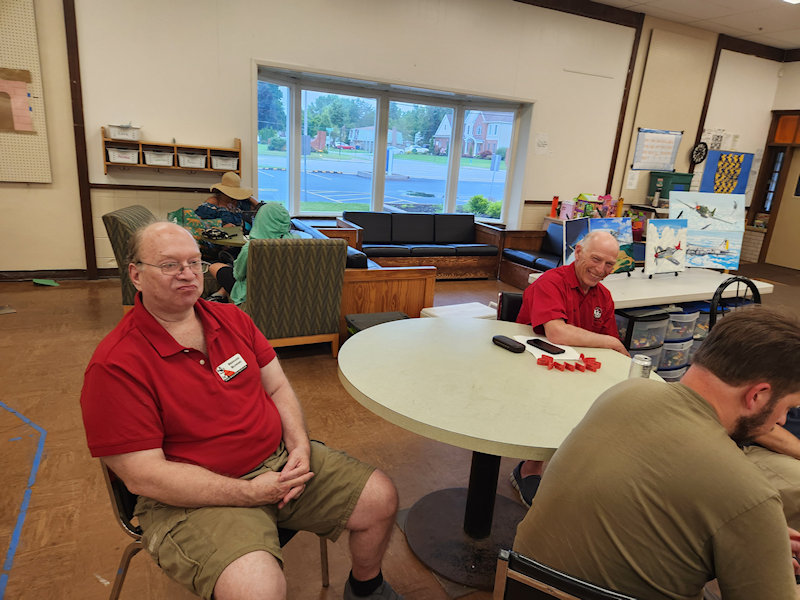
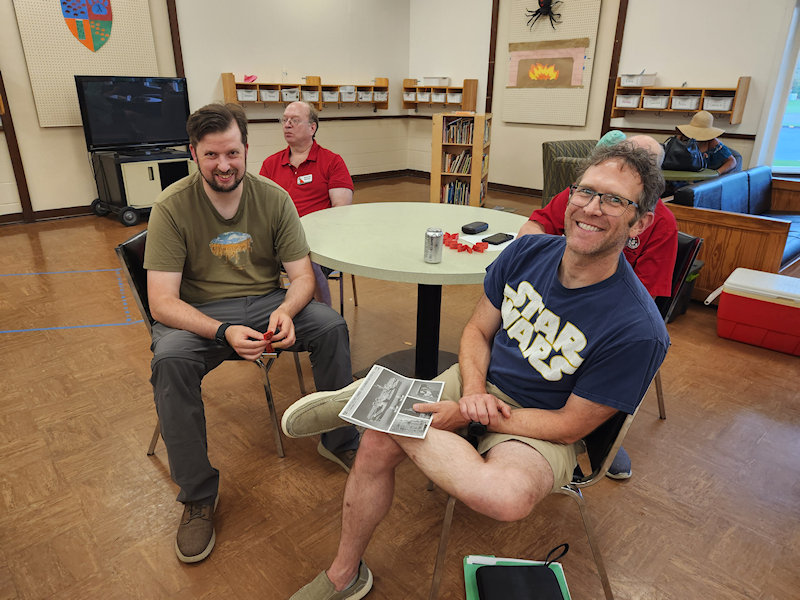
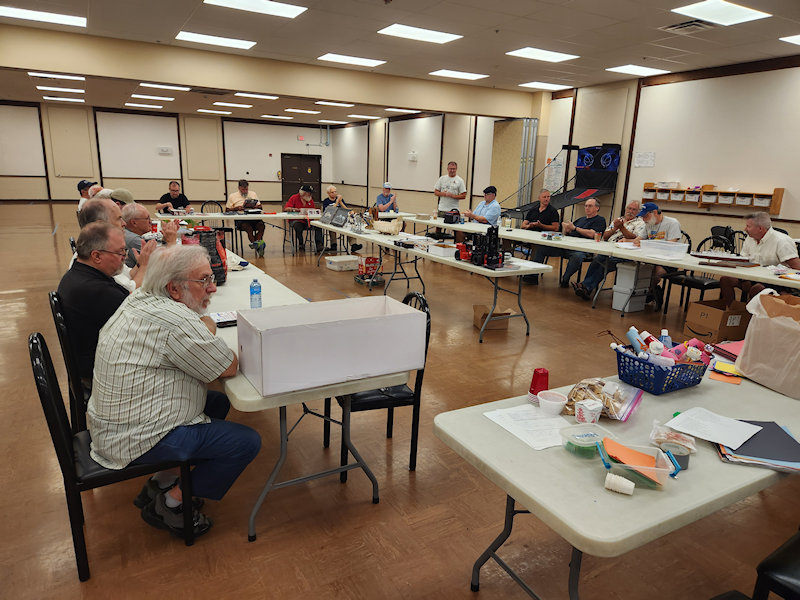
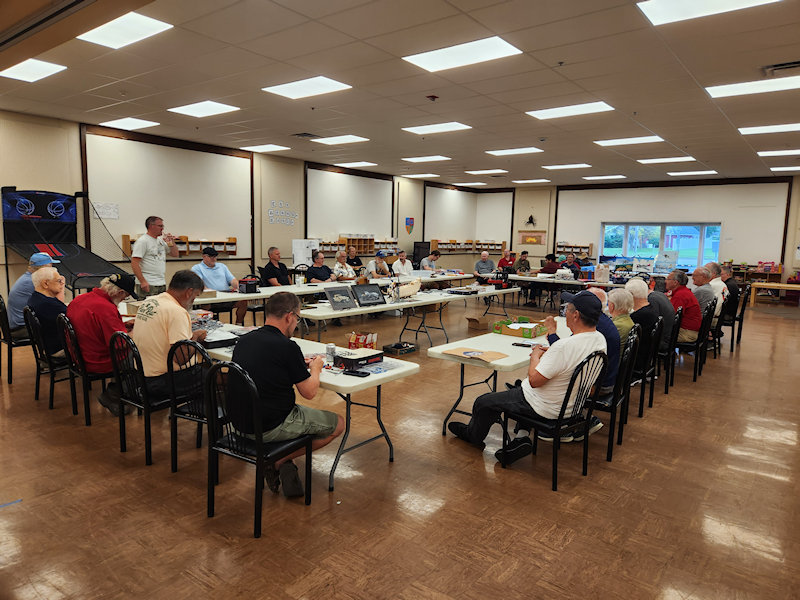
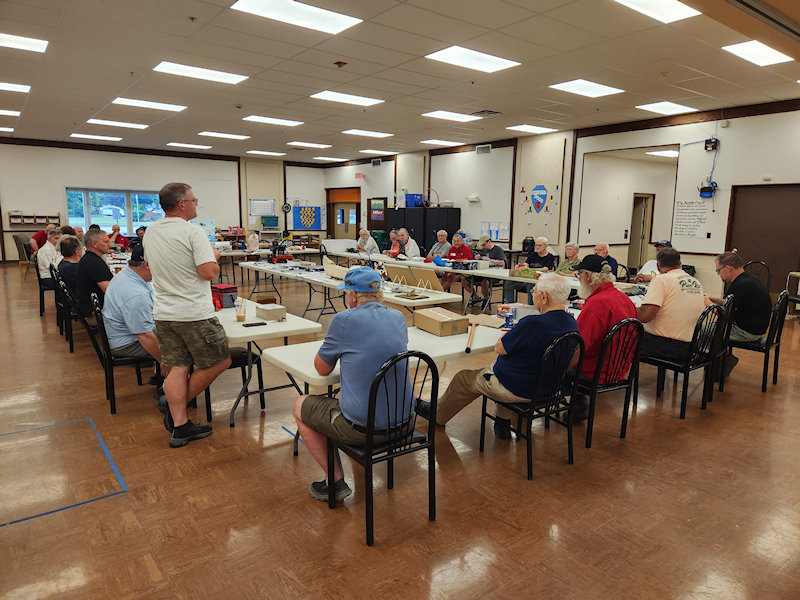
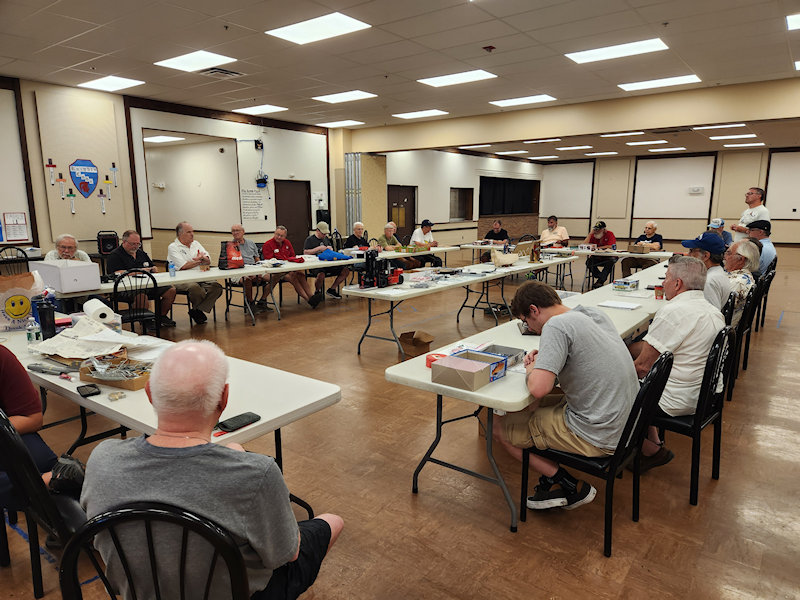
Finally, some around-the-room shots.


Thanks to Bob Conshafter for handling the model tables, and Larry Osolkowski for the photos.
